


Aren’t we all a fan of LED Space Marines? I know I am. Previously we looked at how Bob Hunk made his marines glow and now we have a guide from Sean at Omnissious Gaming.
Sean:
Here is the process I used to make the LED enhanced Redemptor Dreadnought. It was actually pretty easy because the model is so large and has lots of hollow pieces. There were a couple choke points that needed some finessing but overall it was a fun build!
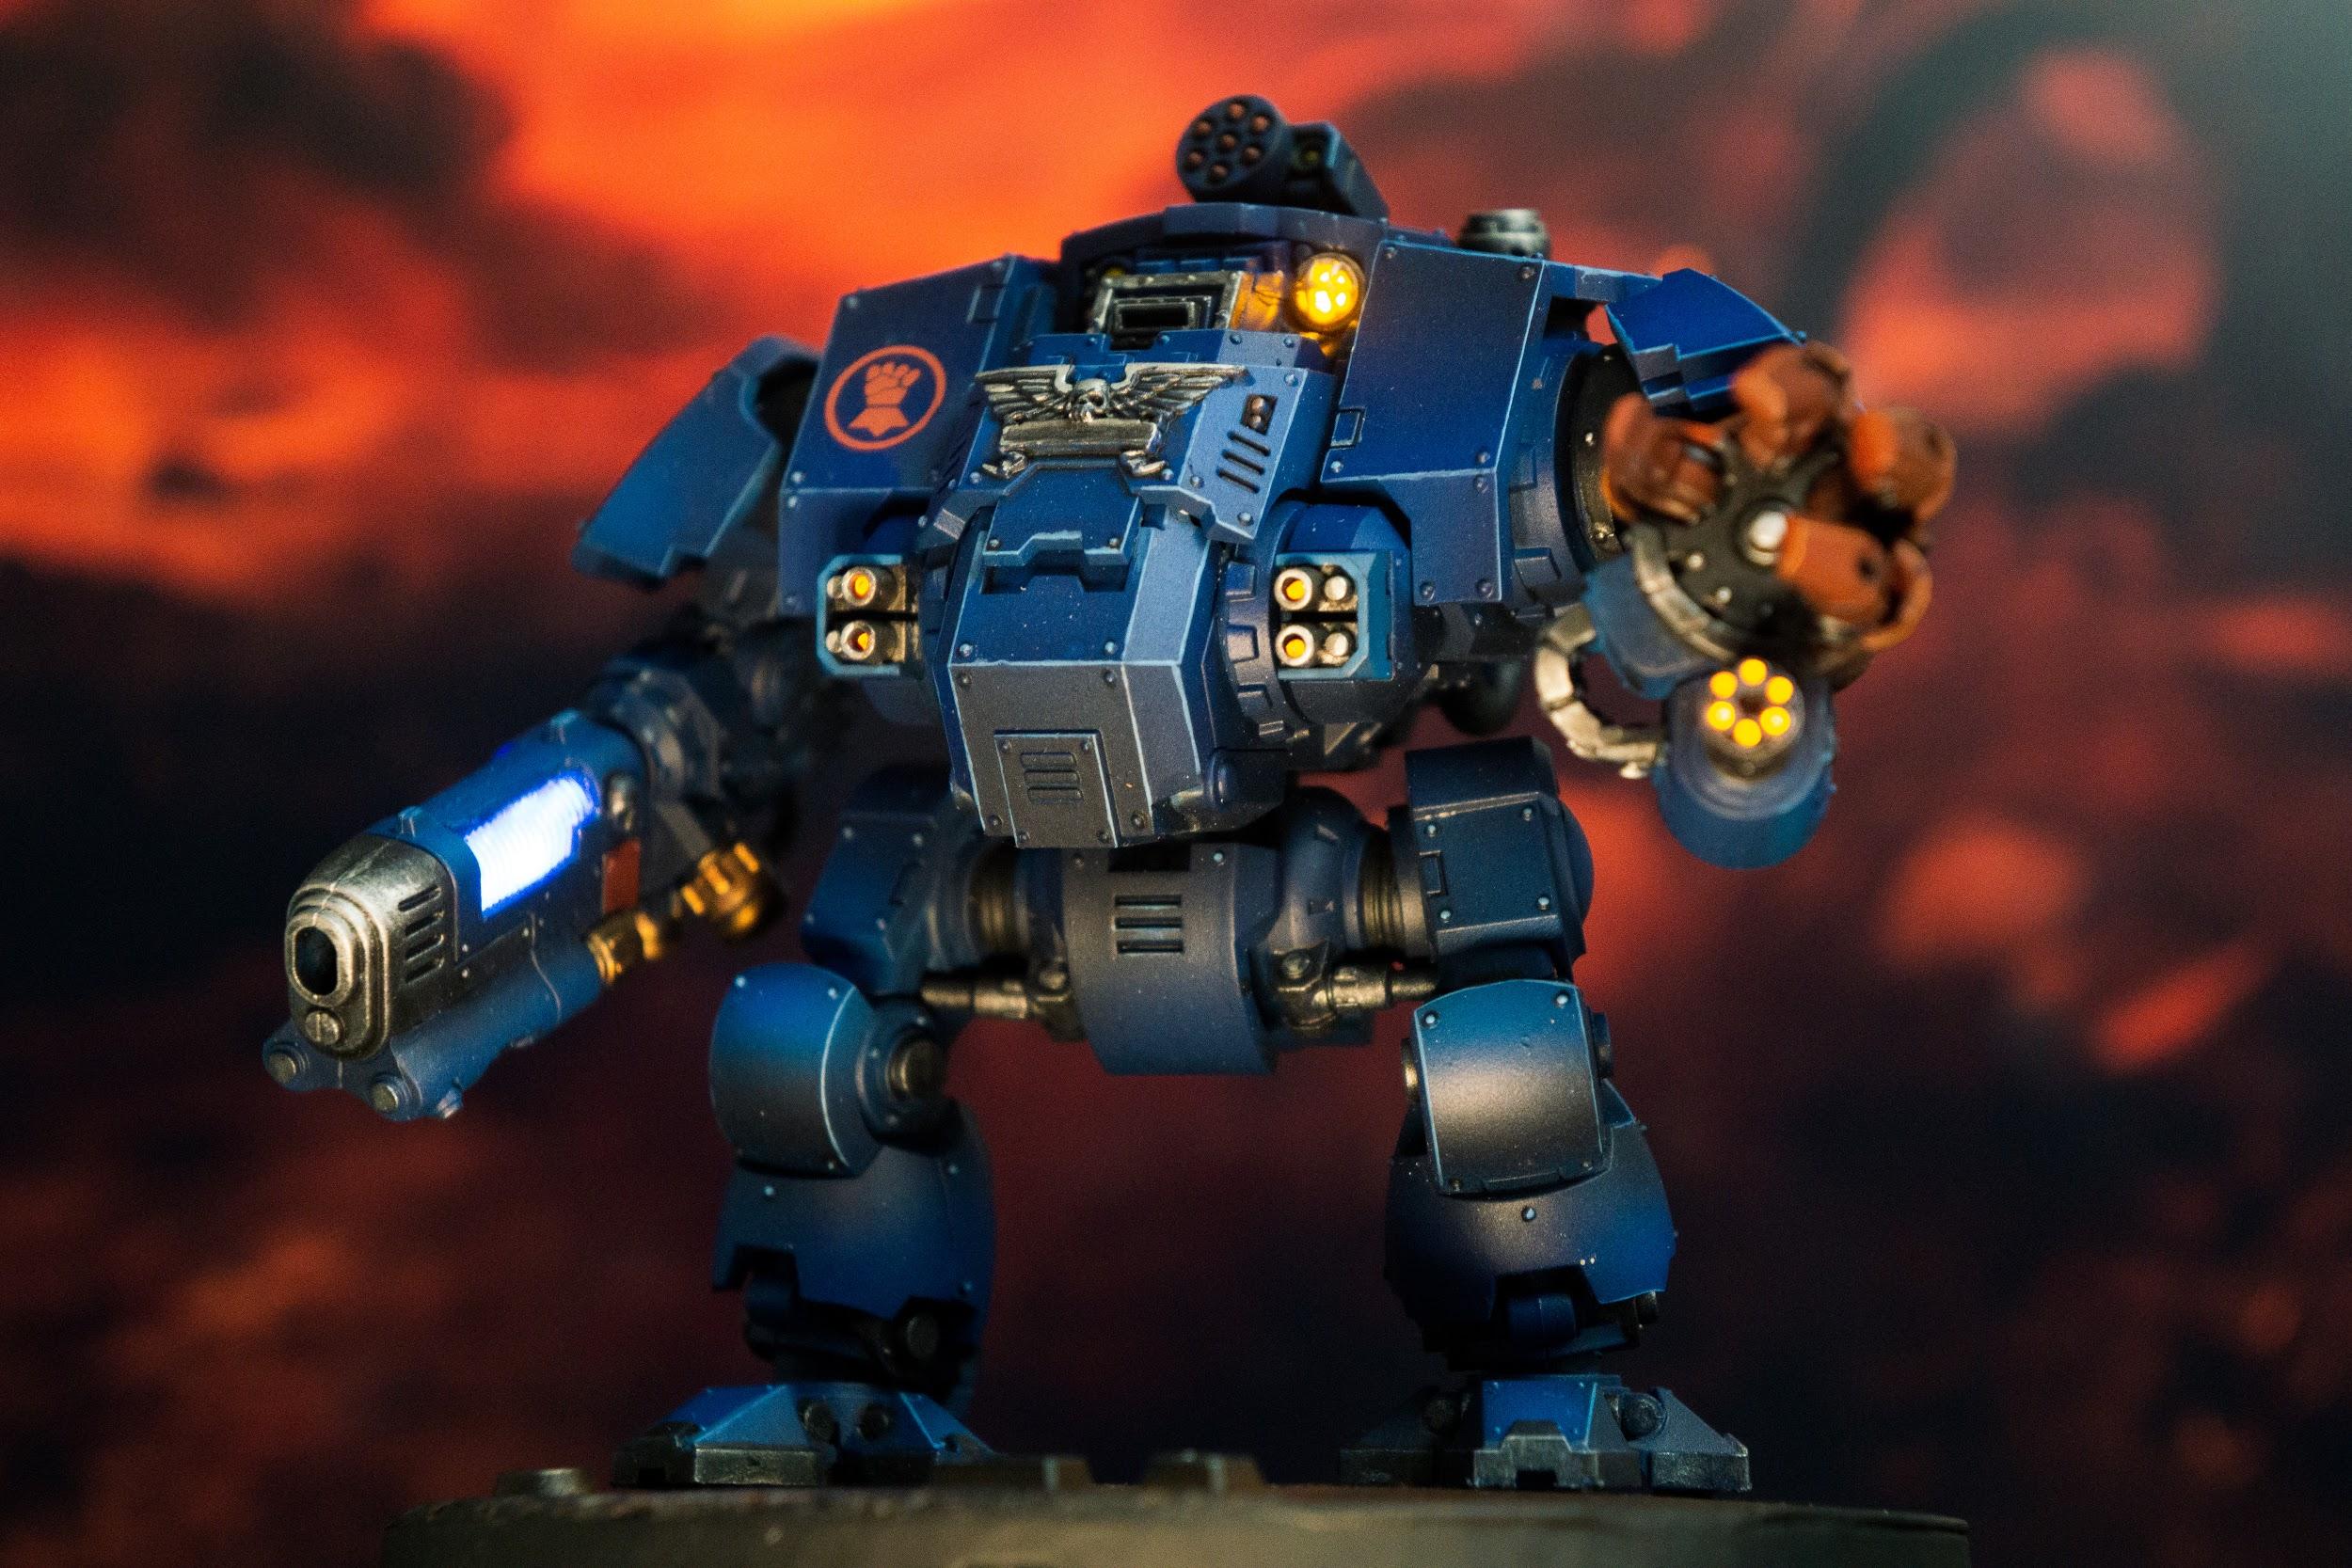
I really love the idea of instilling a sense of realism into models so I wanted to make sure the wires were hidden well. The goal for this build was to get the wires from a power source in the base, through the legs, and distributed to all the end points in the chest.

I started from the bottom and built my way up. The feet had a nice pocket to drill into and the main leg part was split into two half pieces on each side. This made it easy to carve out a channel and then put the pieces together around the wires. The legs are very forgiving because there are armor plates that go over most of the front section.
The hip joint was one of the trickiest parts because there was no clear way to get to it. I found a clever way to go up the side of the leg and then coil in through this hole on the joint part of the hip piece. Its offset because the legs come out at a slight angle. This part was also relatively forgiving because there is a piece that goes over all the wires and jenky cuts.
Once in the hip piece things were super easy! The whole thing is hollow and in two pieces so you can snap it around the wire cluster. The top joint has a lot of surface area so it’s easy to bore through with wiggle room.
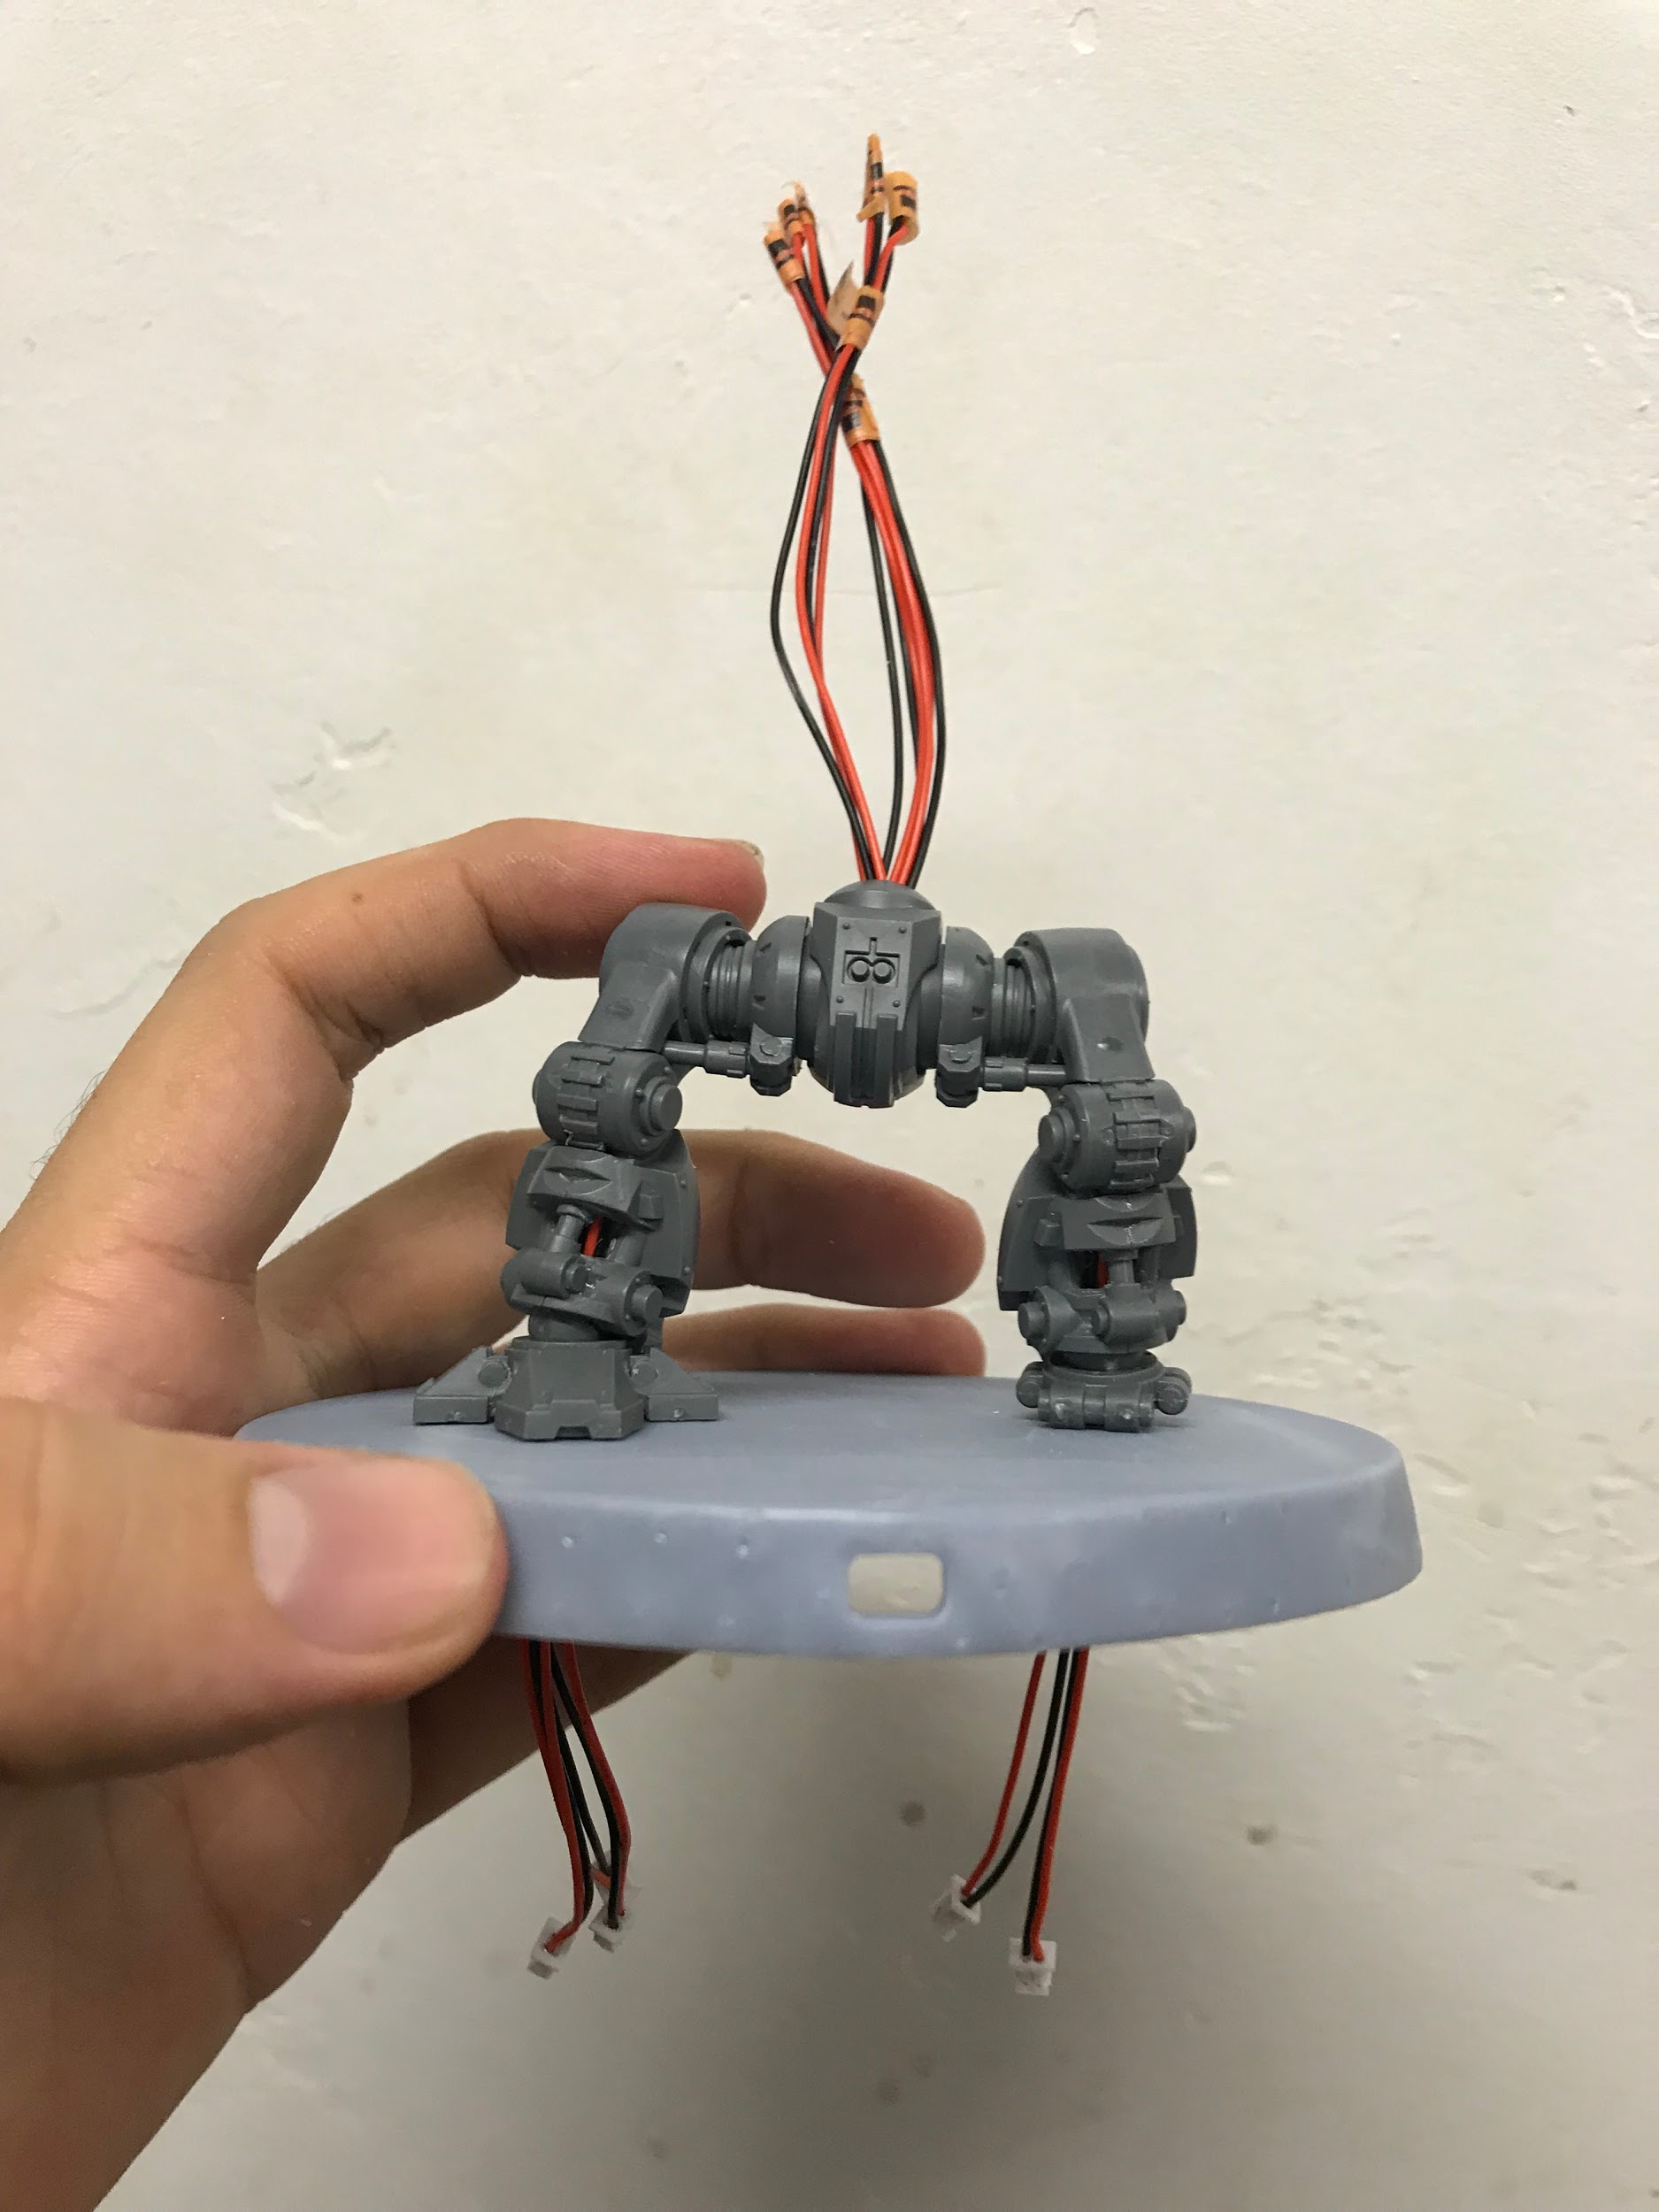
Here’s all the leg pieces put together with the base.

The wires coming through the bottom. The two circular recesses are where the battery packs will go to power all the lights.
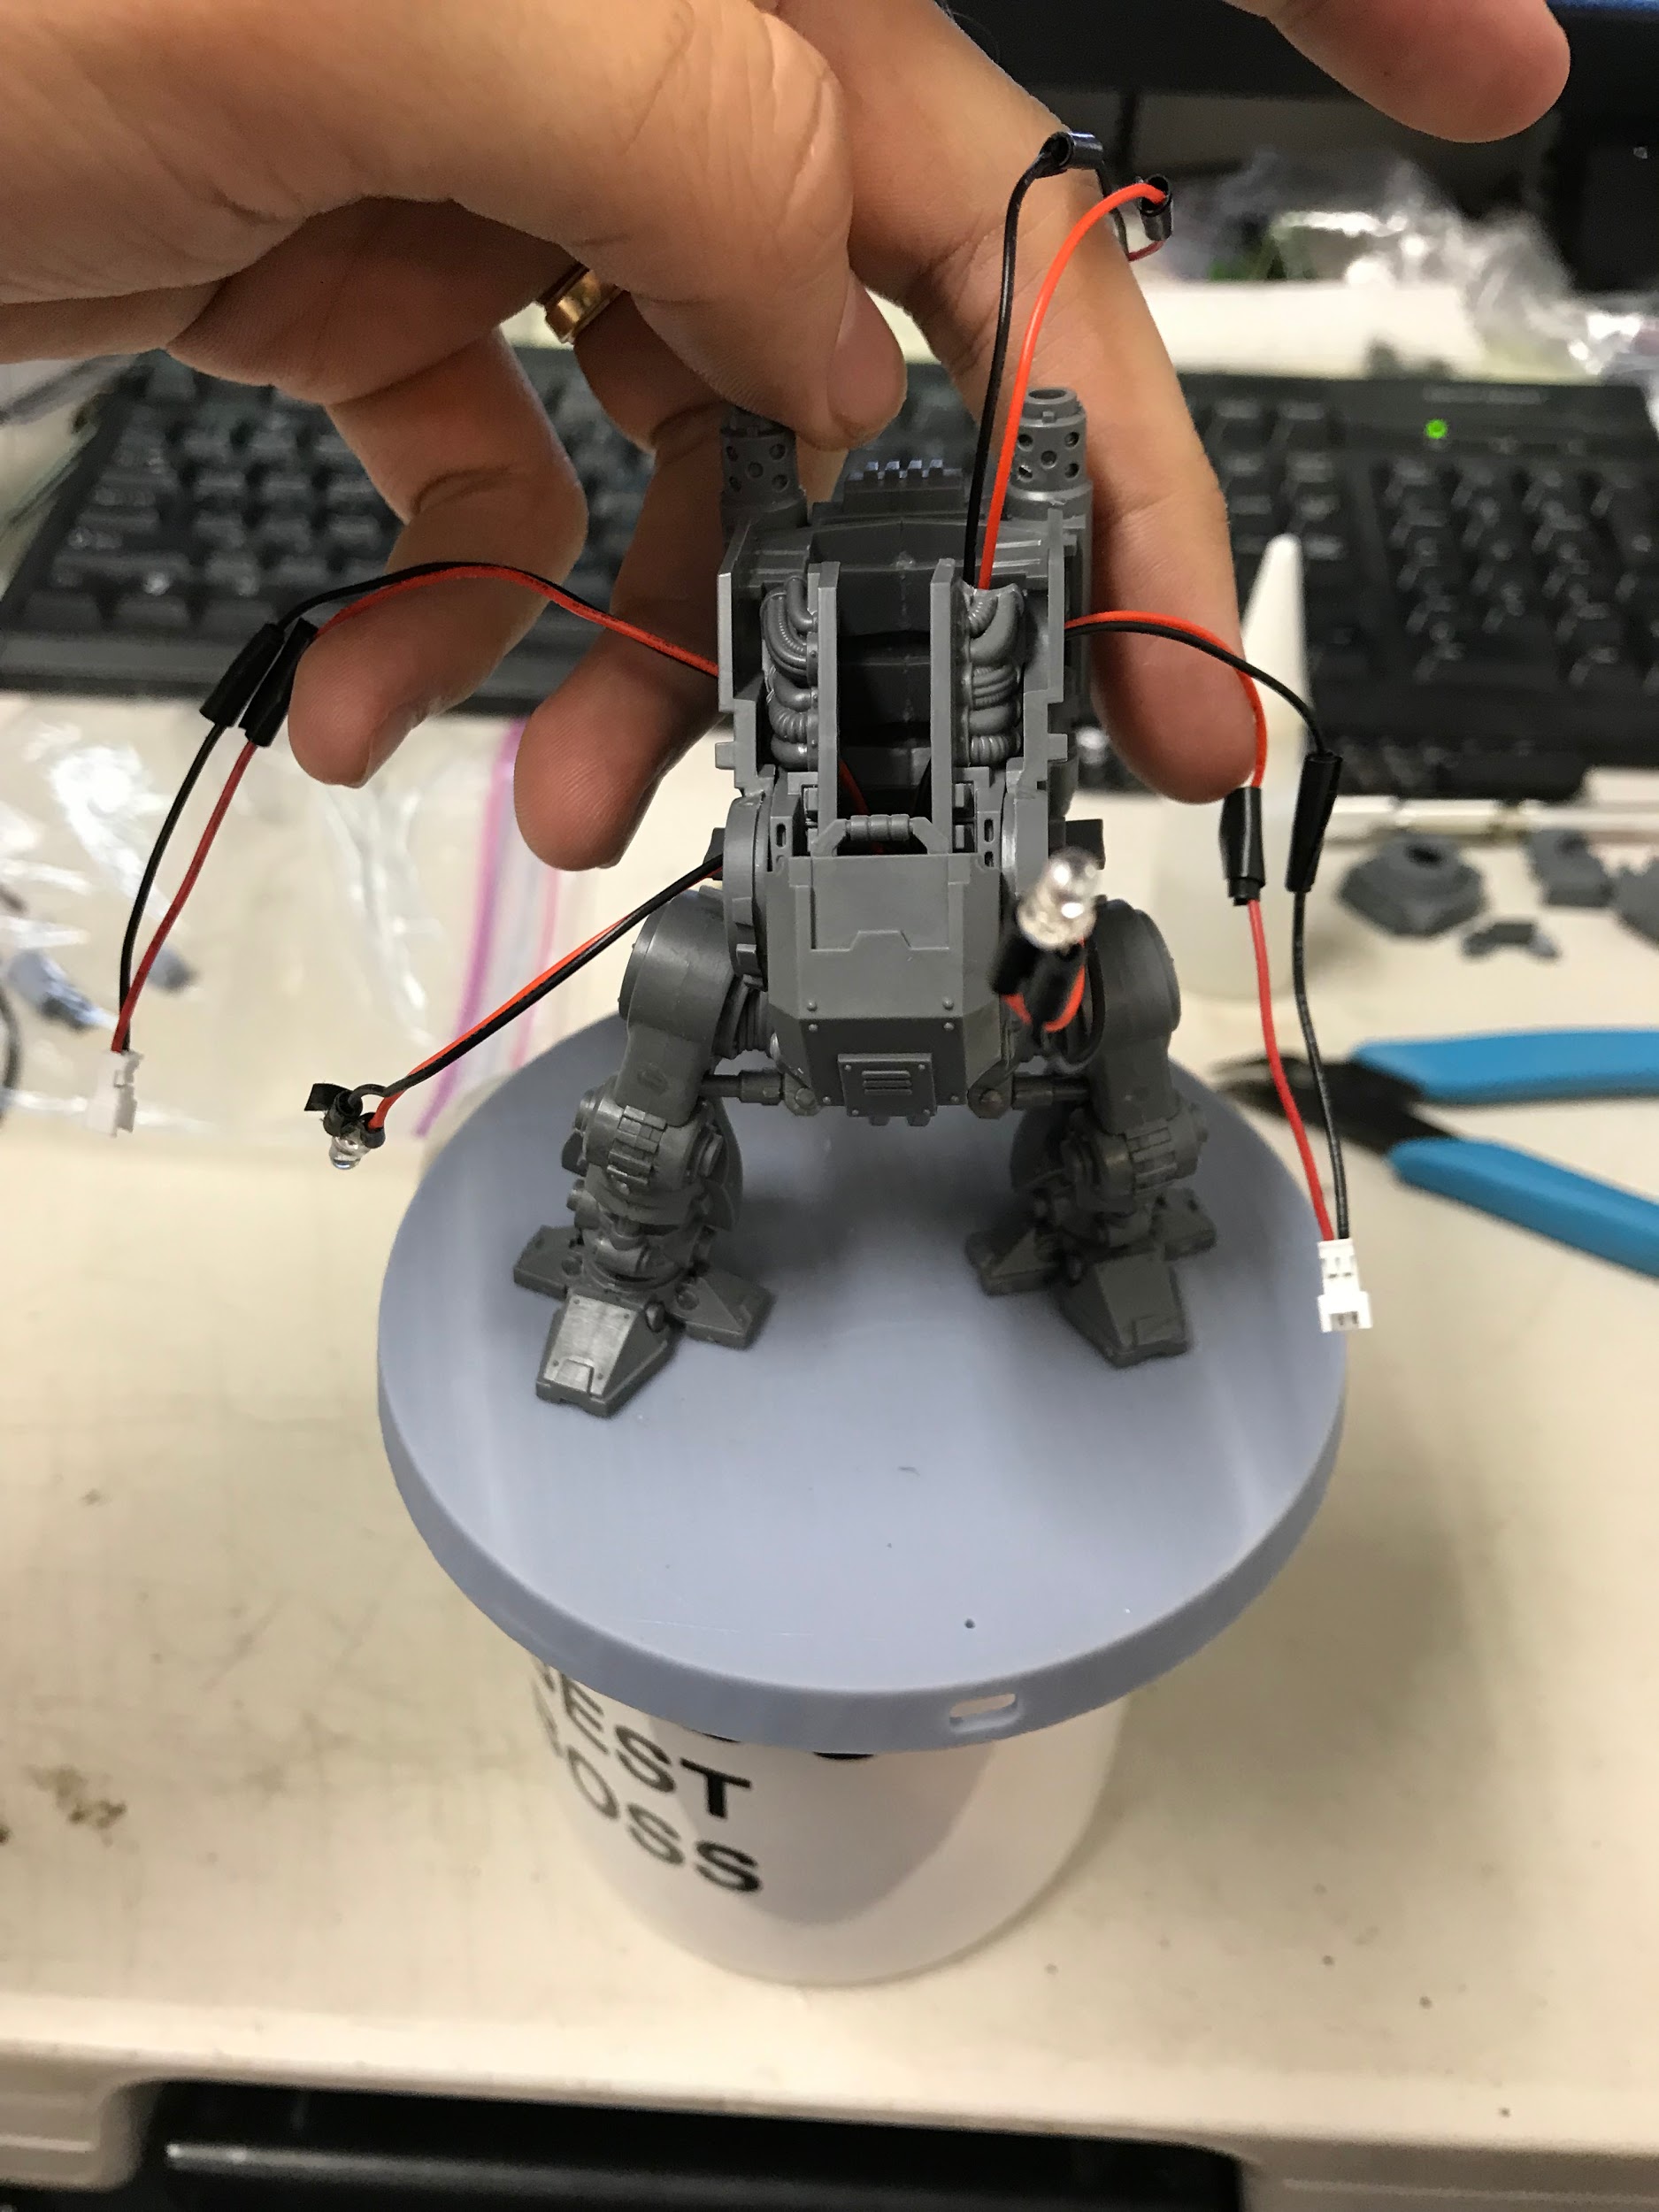
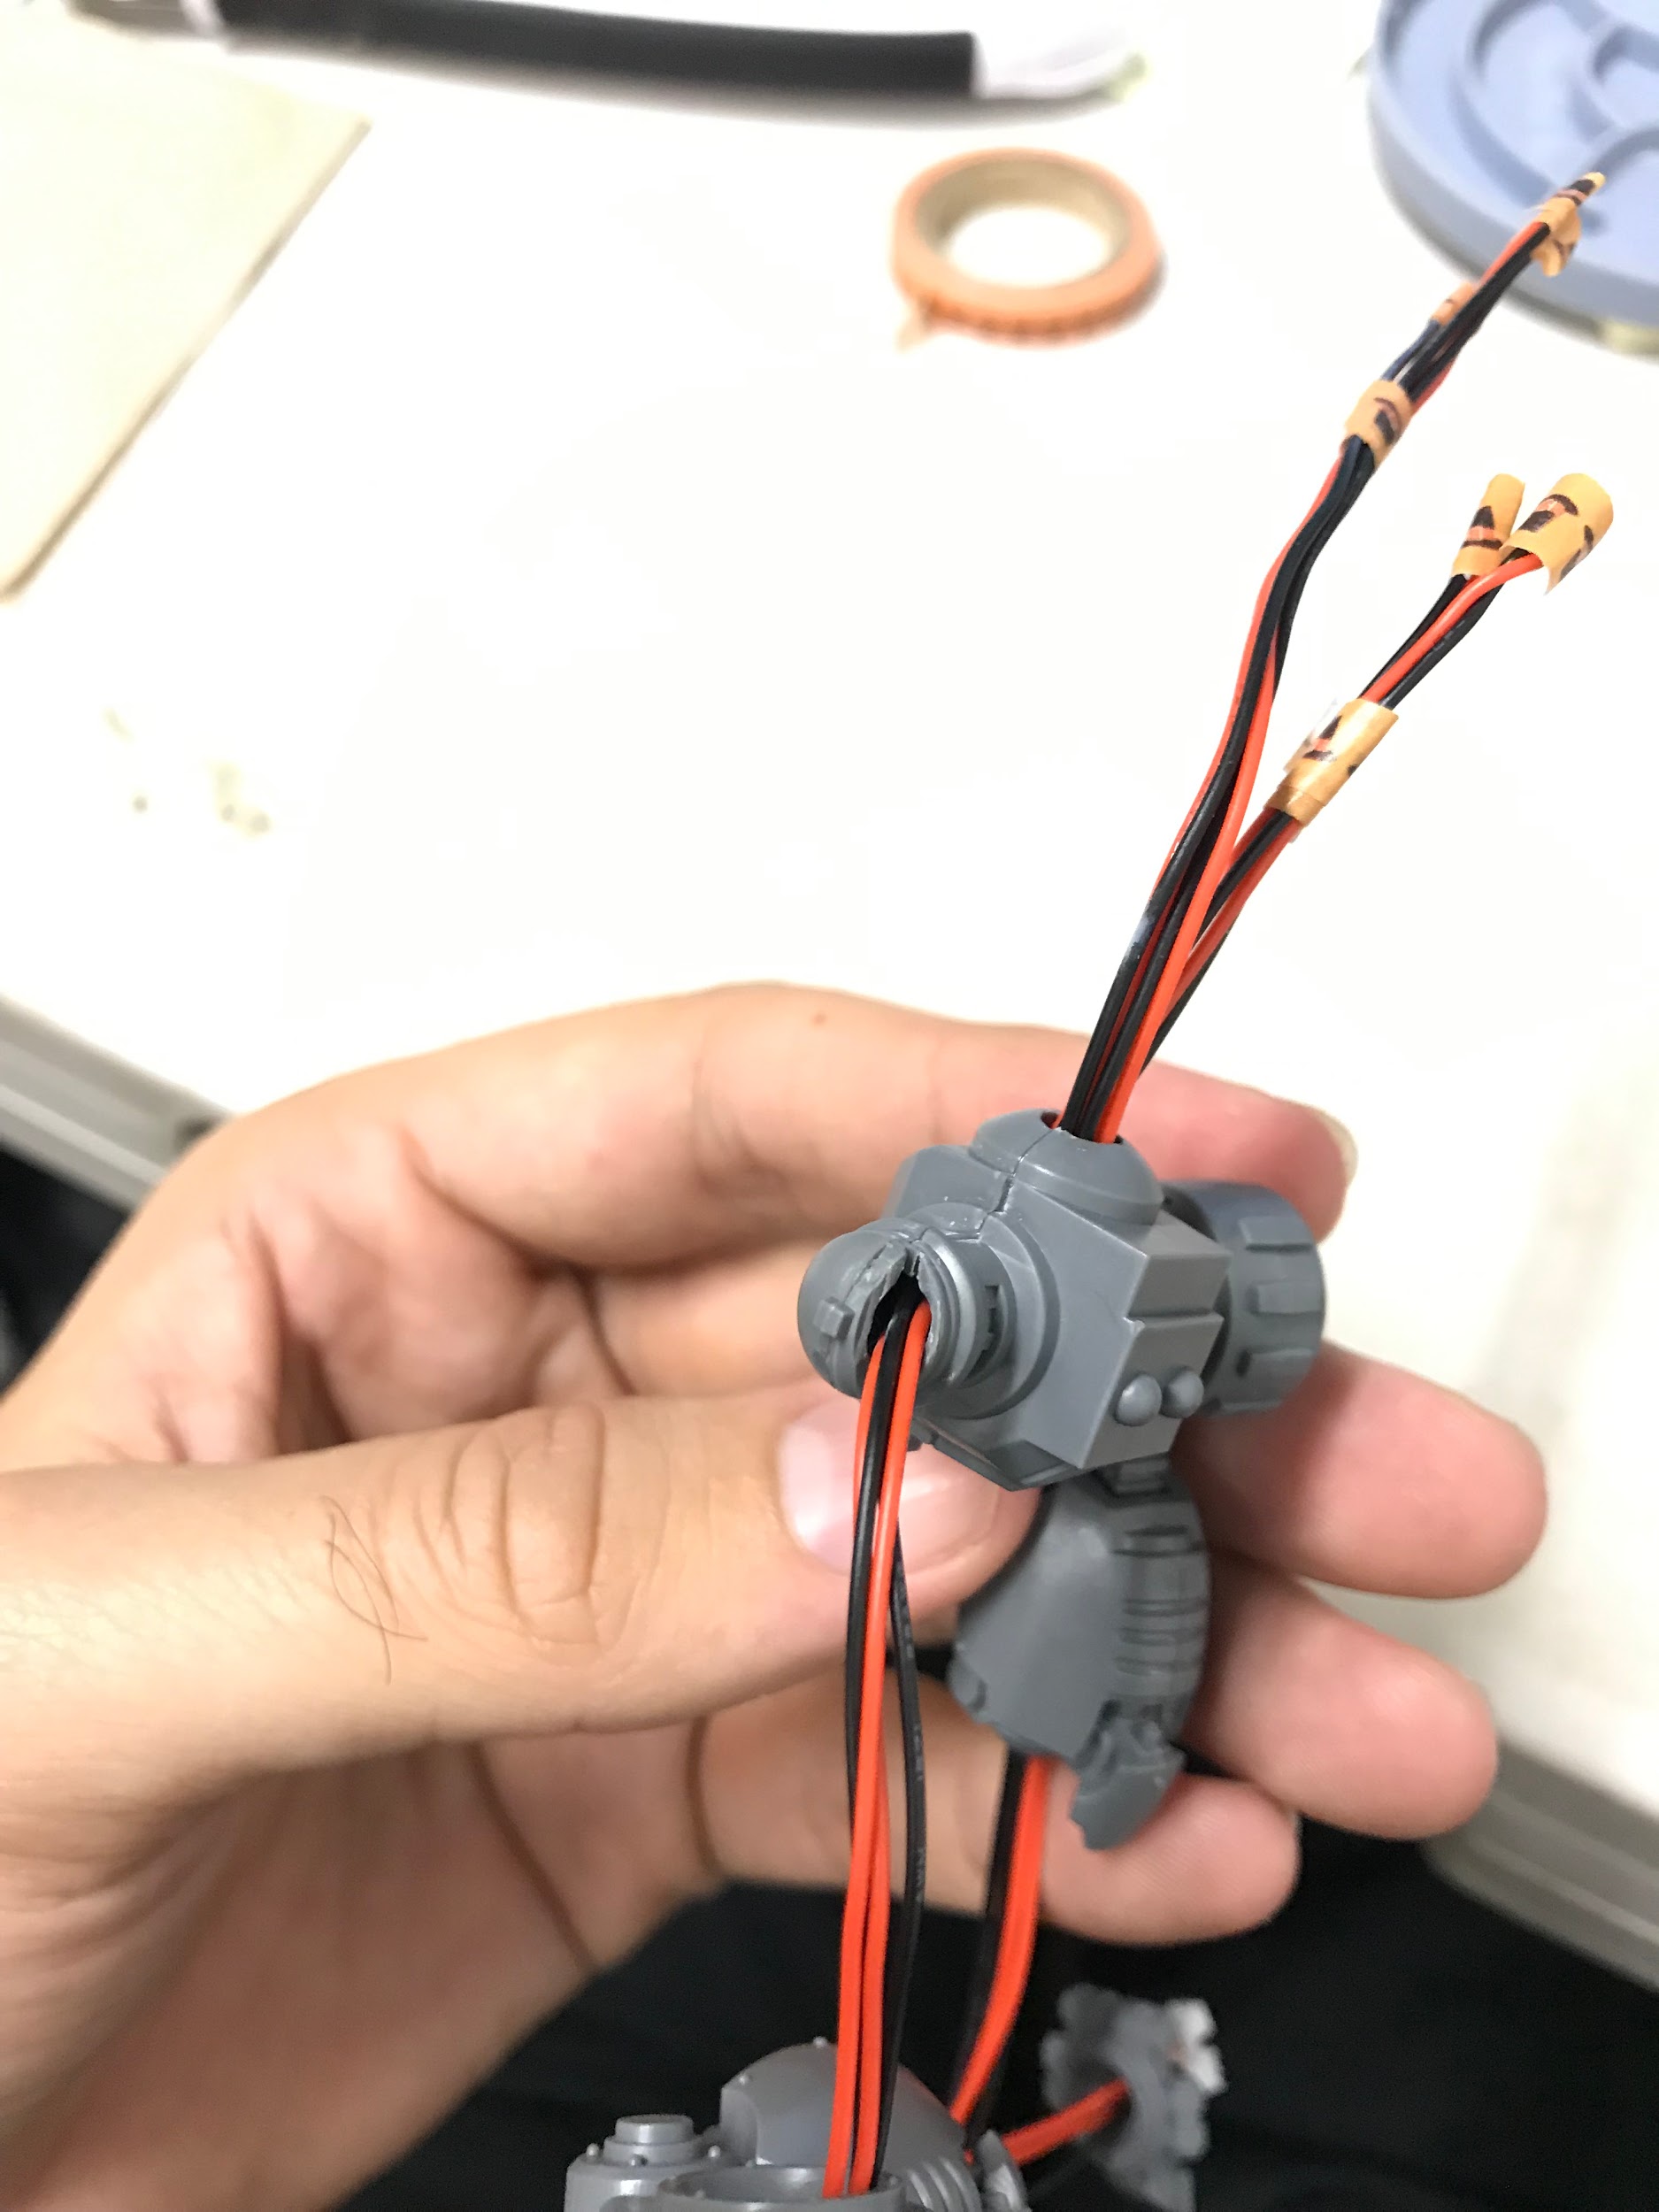
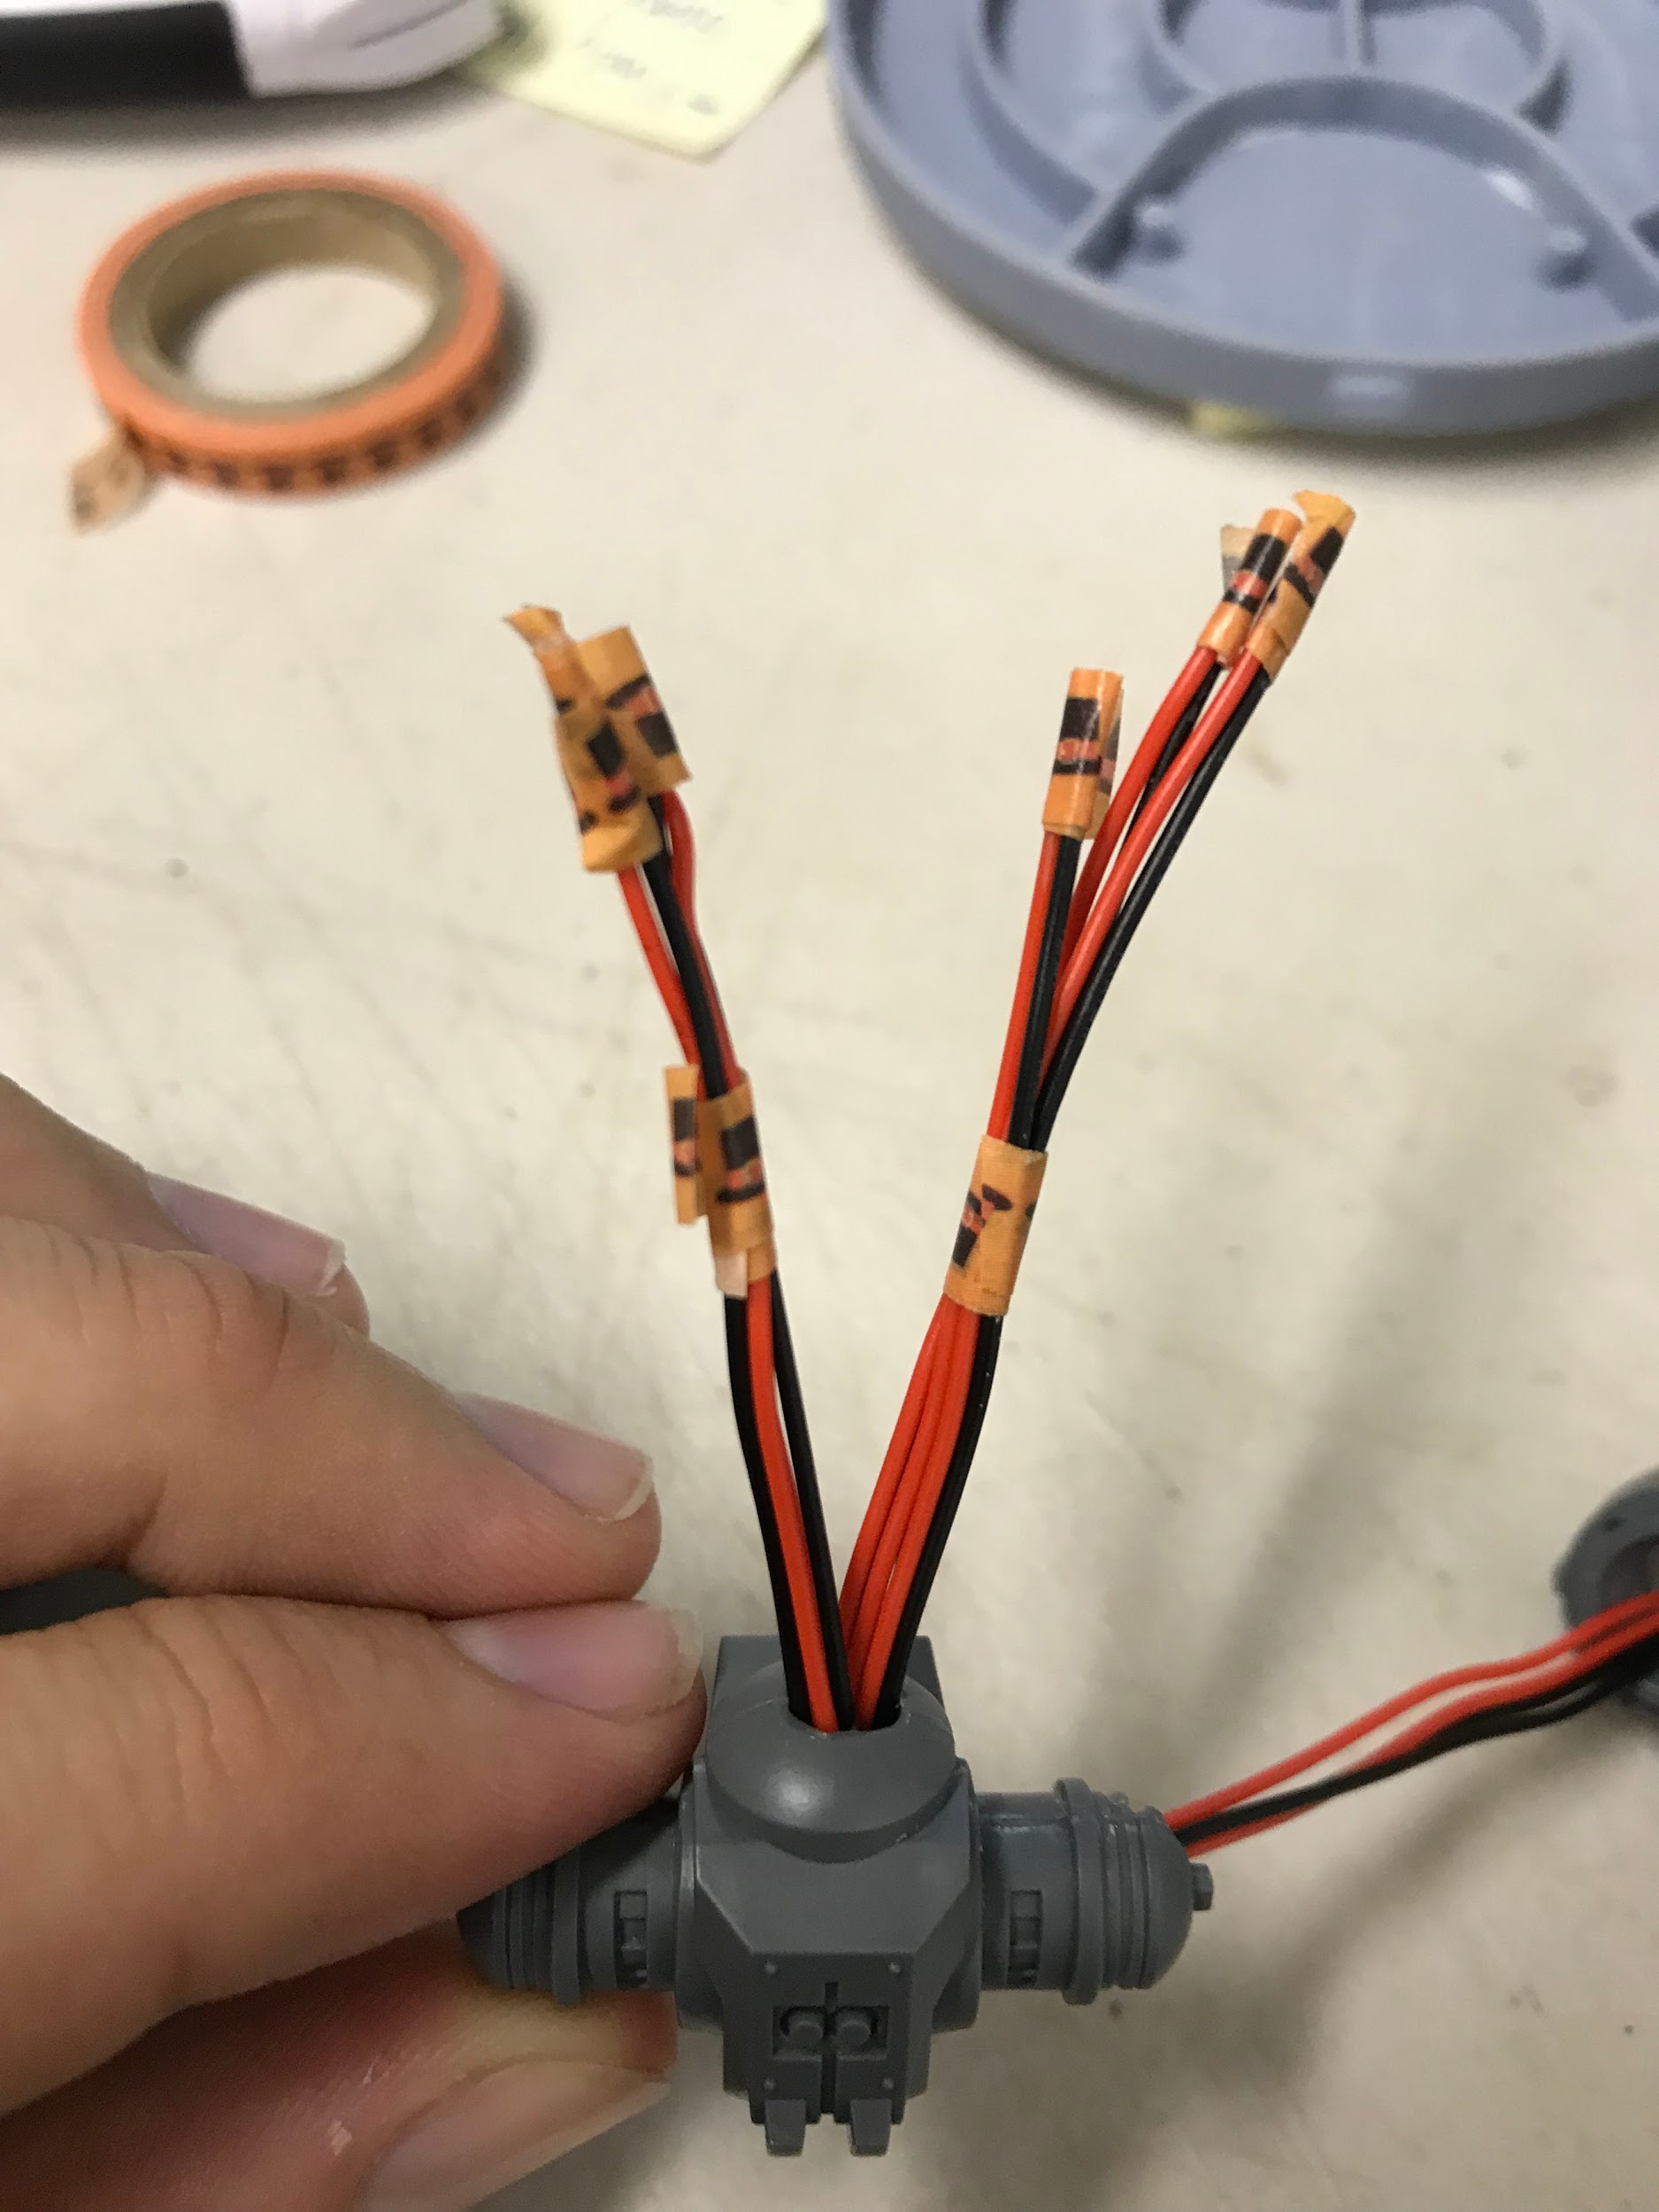
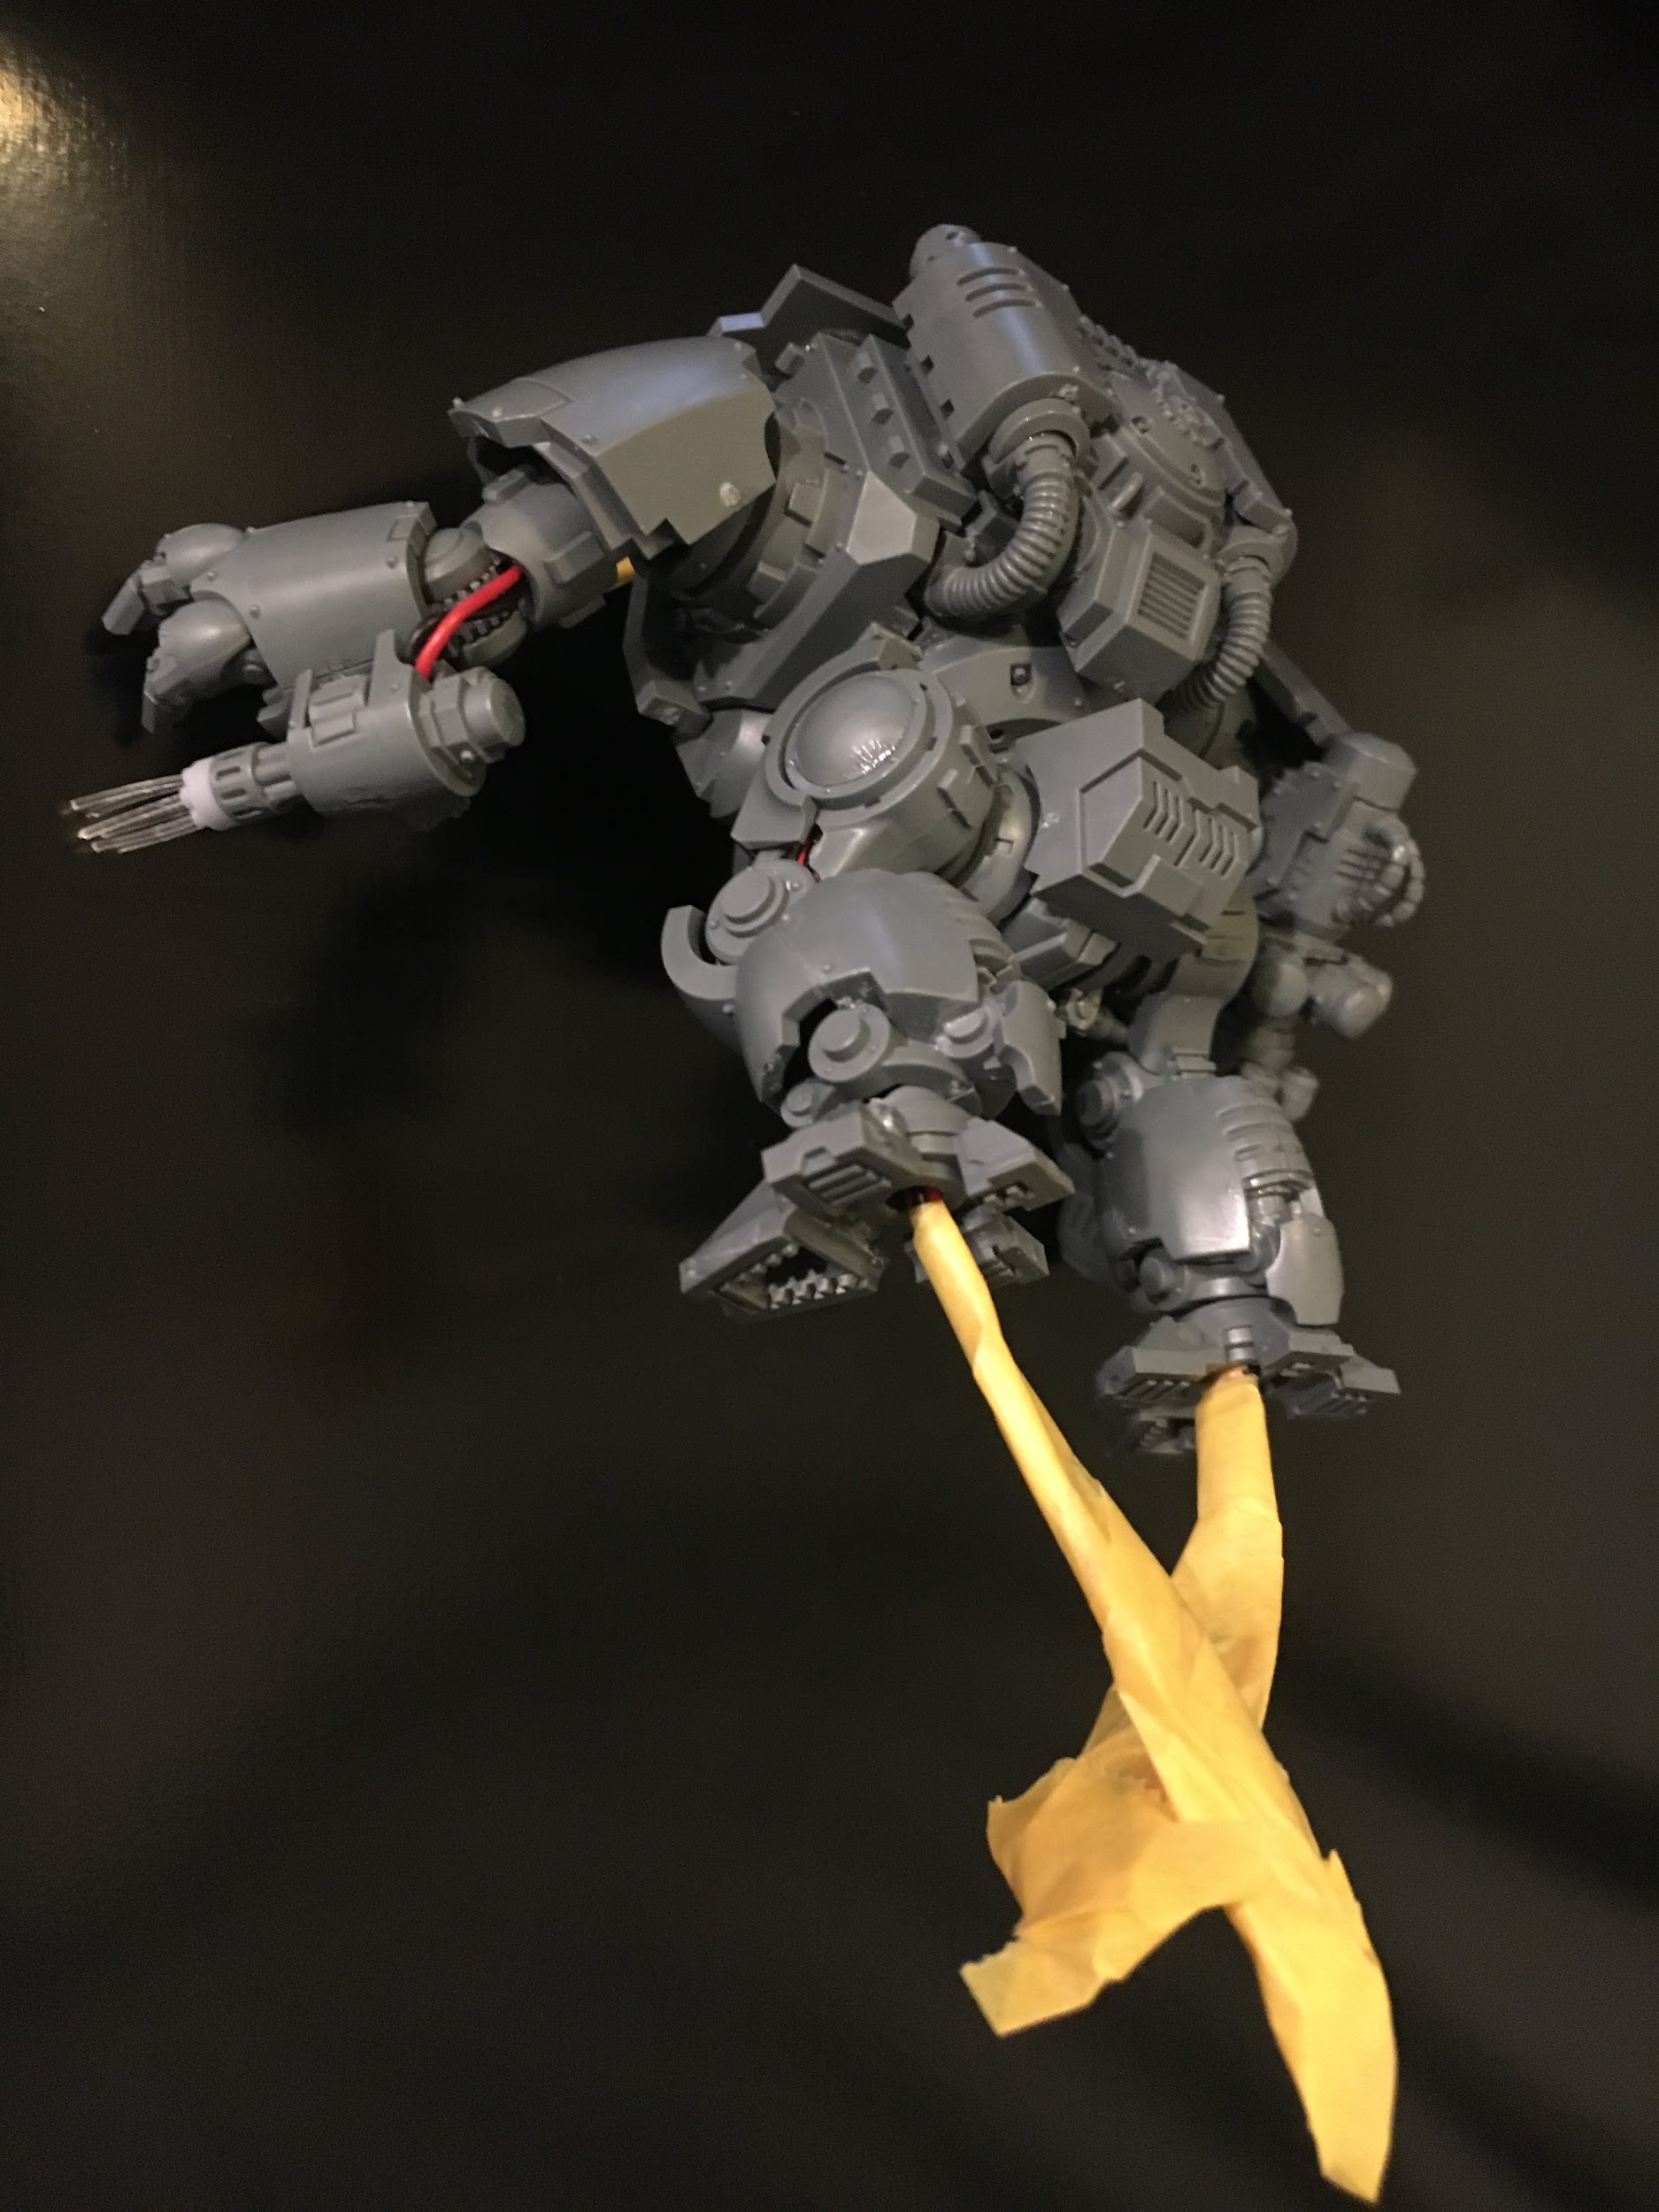
I assembled part of the chest piece and started fitting the wires through to their designated places. This part required a little fiddling with and at times felt like wrestling with an octopus.
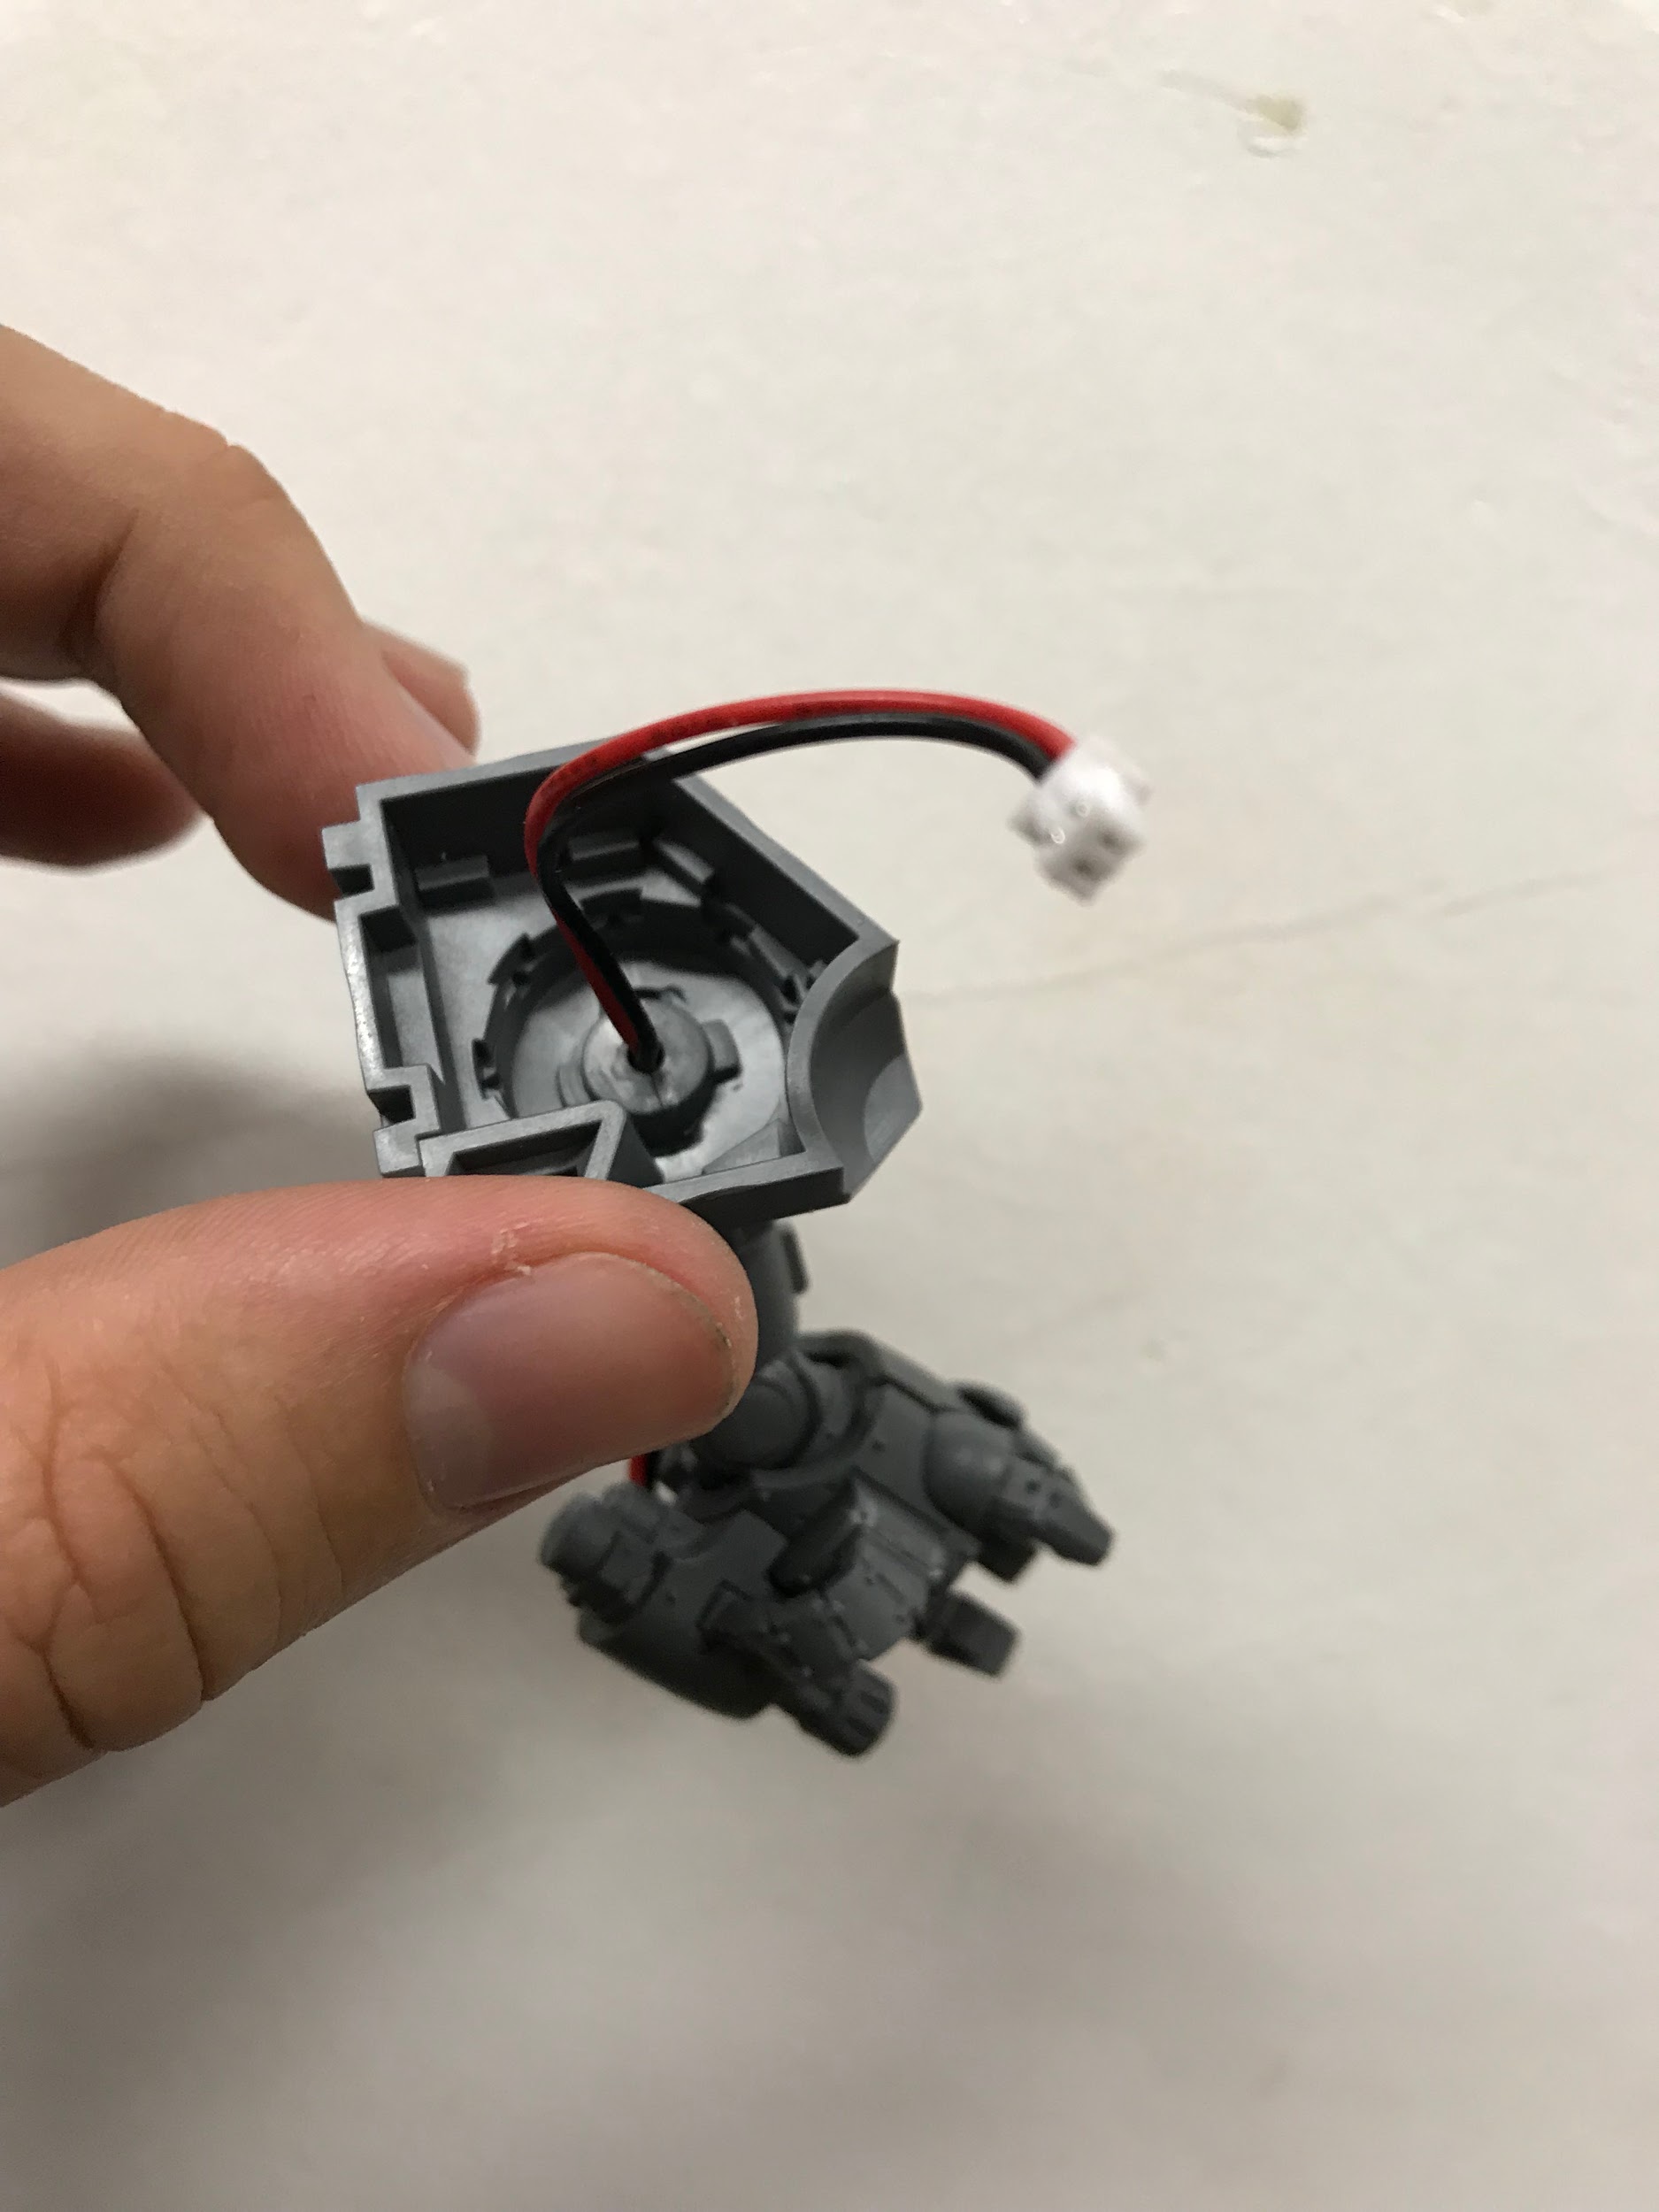
I kept the arm pieces detachable by fitting them with male plugs that attach to female plugs in the chest.
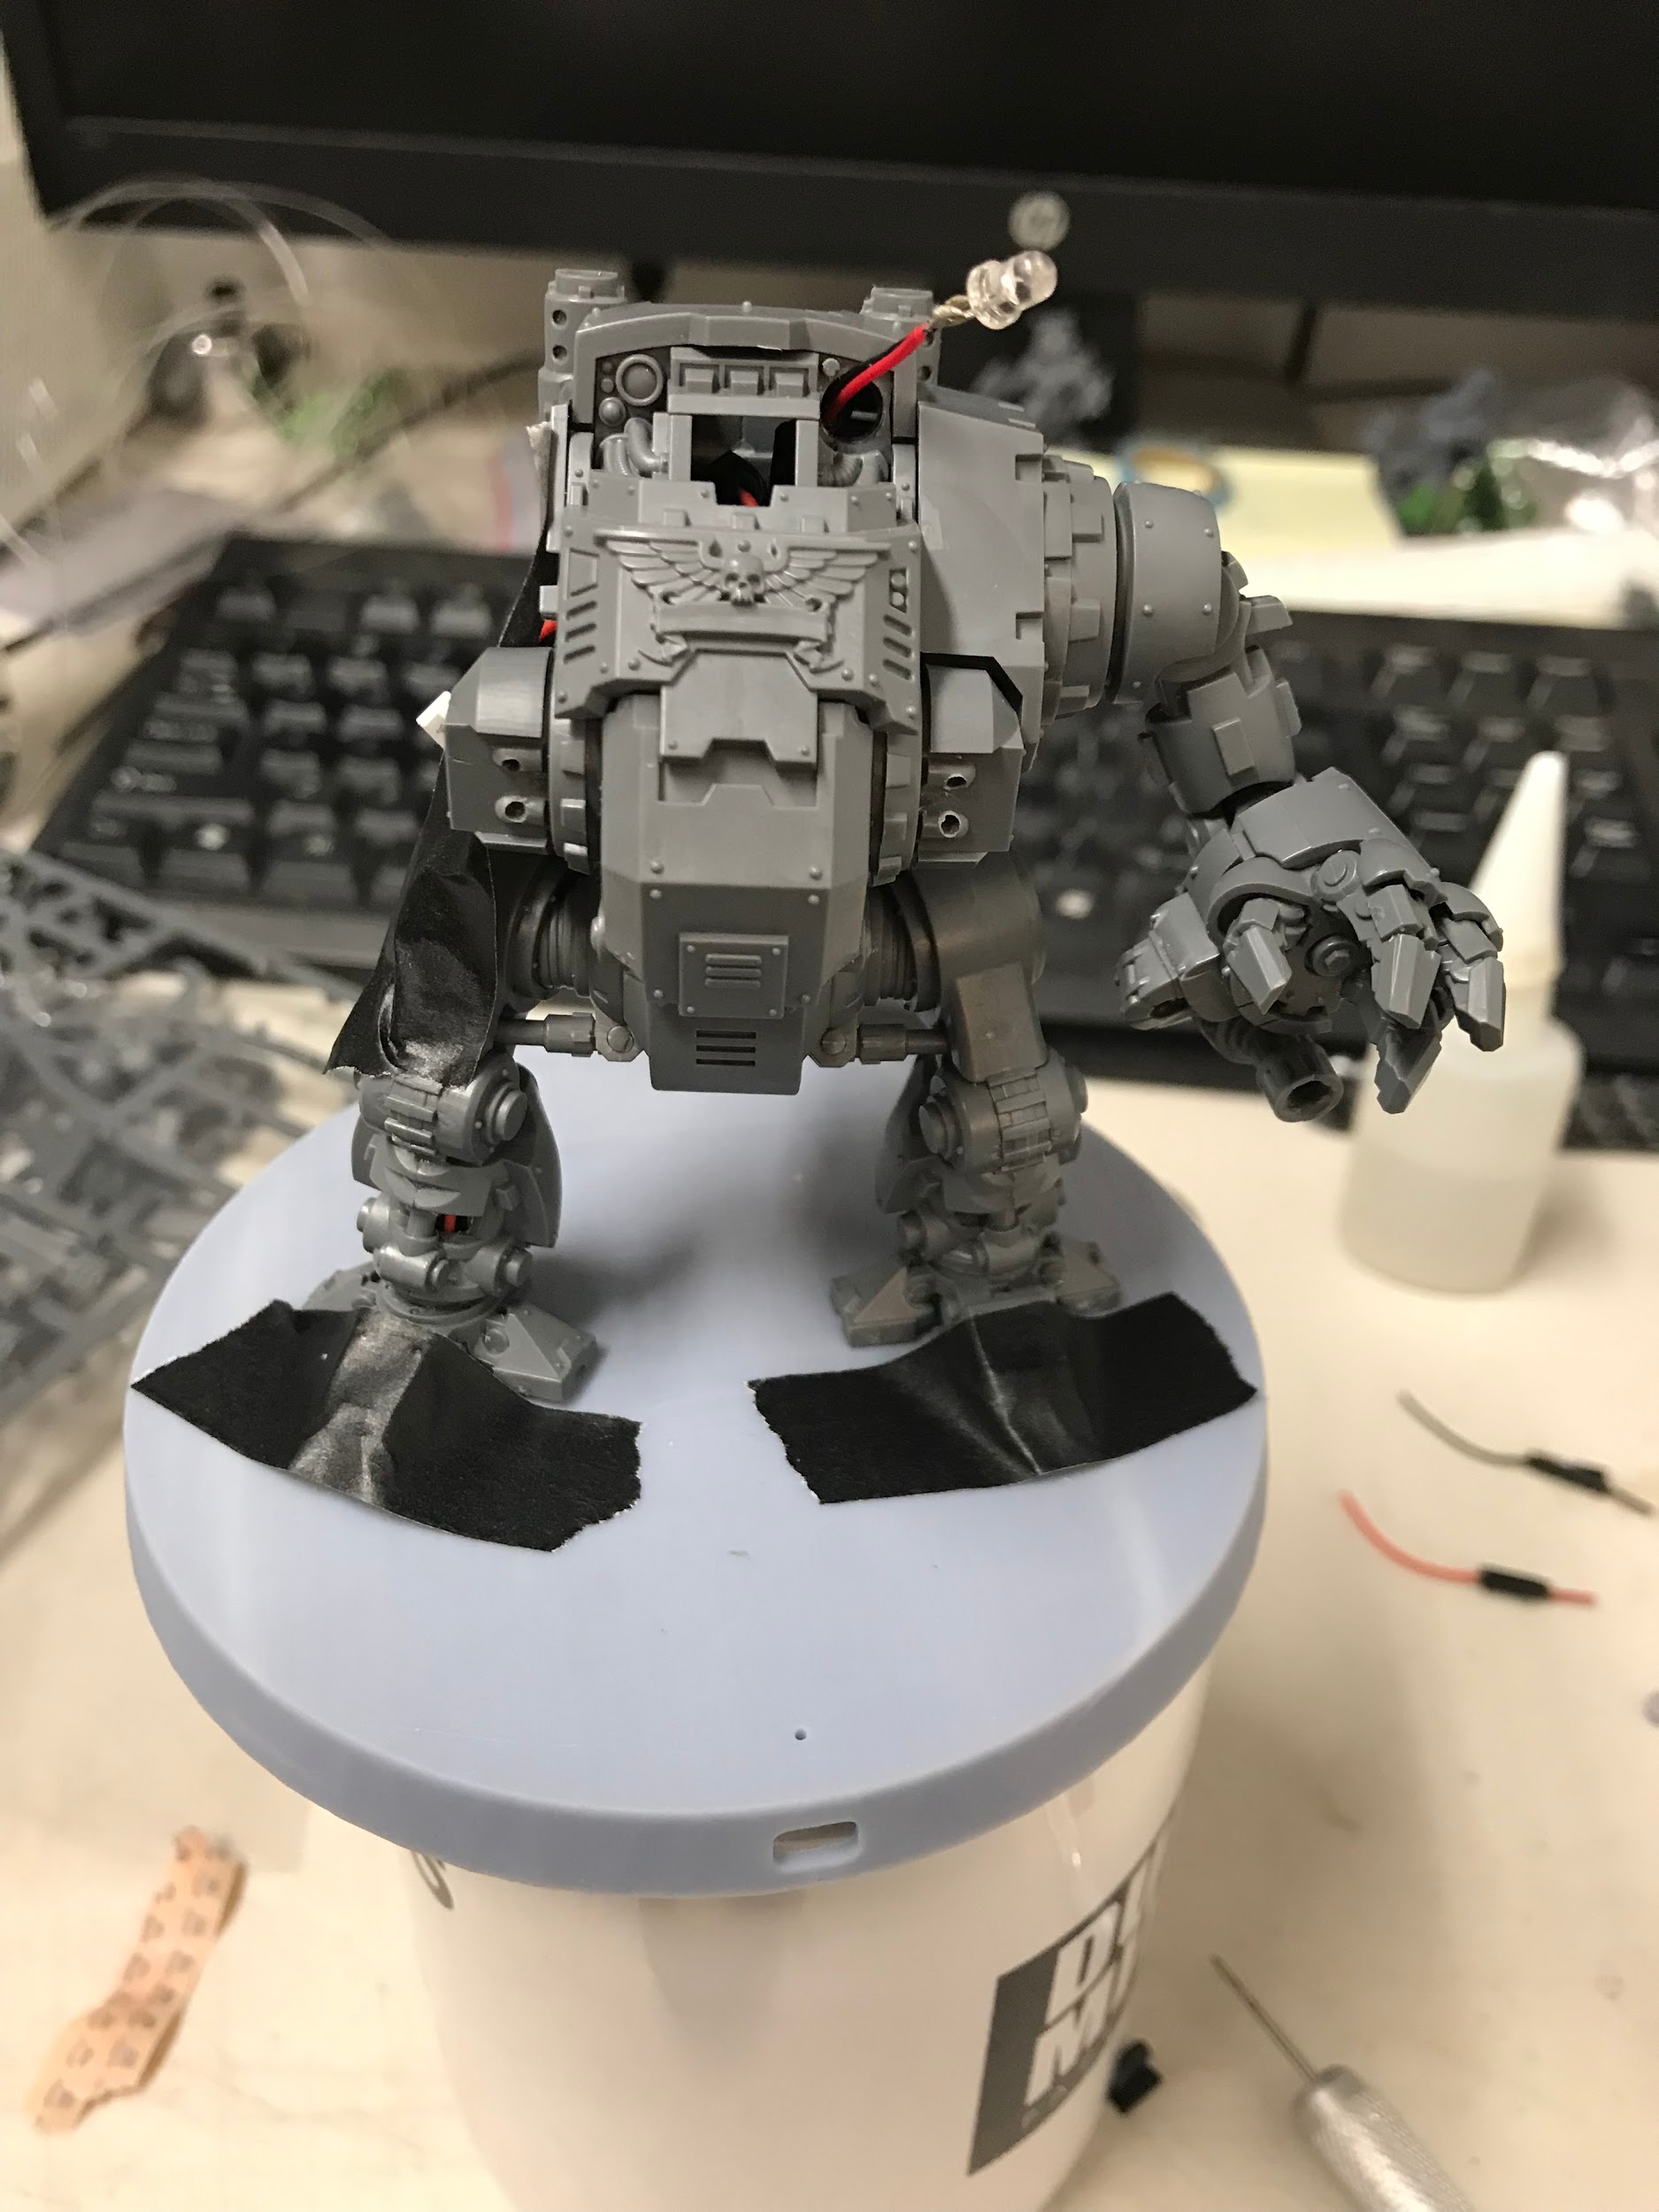
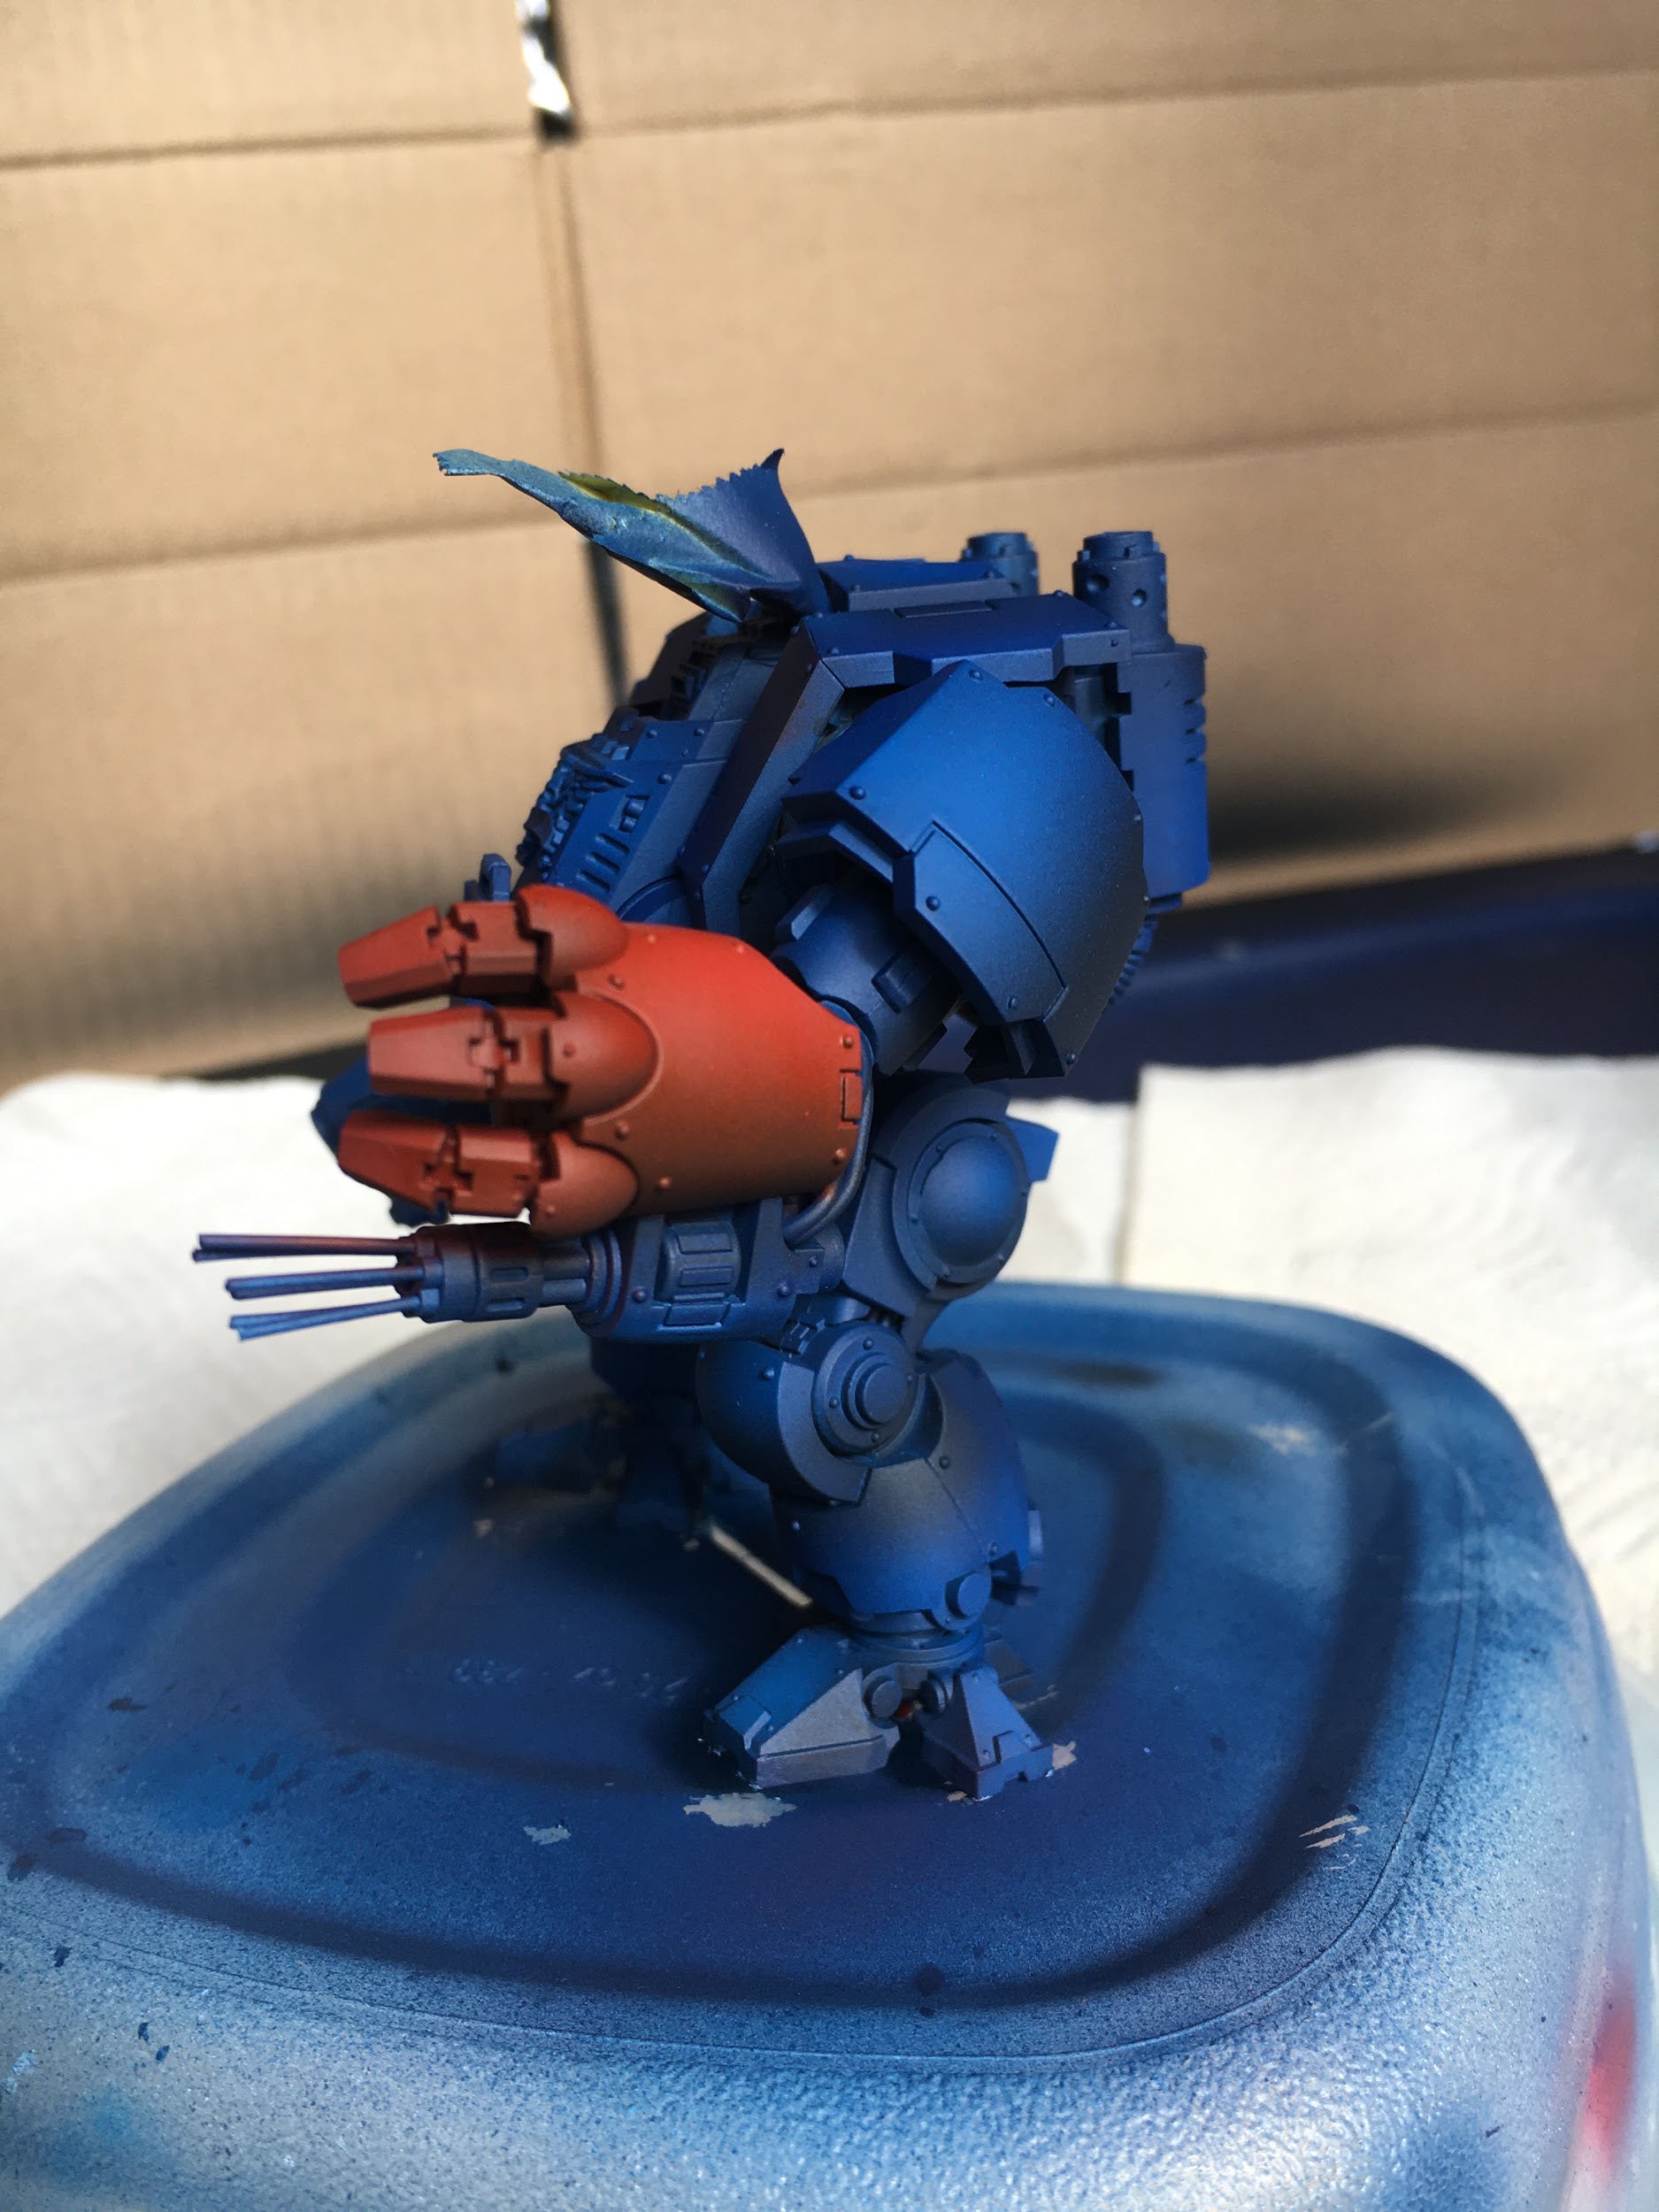
It’s coming together! For the chest bolters I used a single LED on each side that splits to each turret by fiber optics! Fiber optics are a great way to get more light features out of a single LED. I used fiber optics for the gatling gun on the fist as well!

For the plasma gun, I cut out the plastic part that is supposed to be glowing and 3D printed a replica in transparent resin. (Here is a link to some STL files for this) There was plenty of room in the gun for the LED and it was in two pieces which made it very convenient!
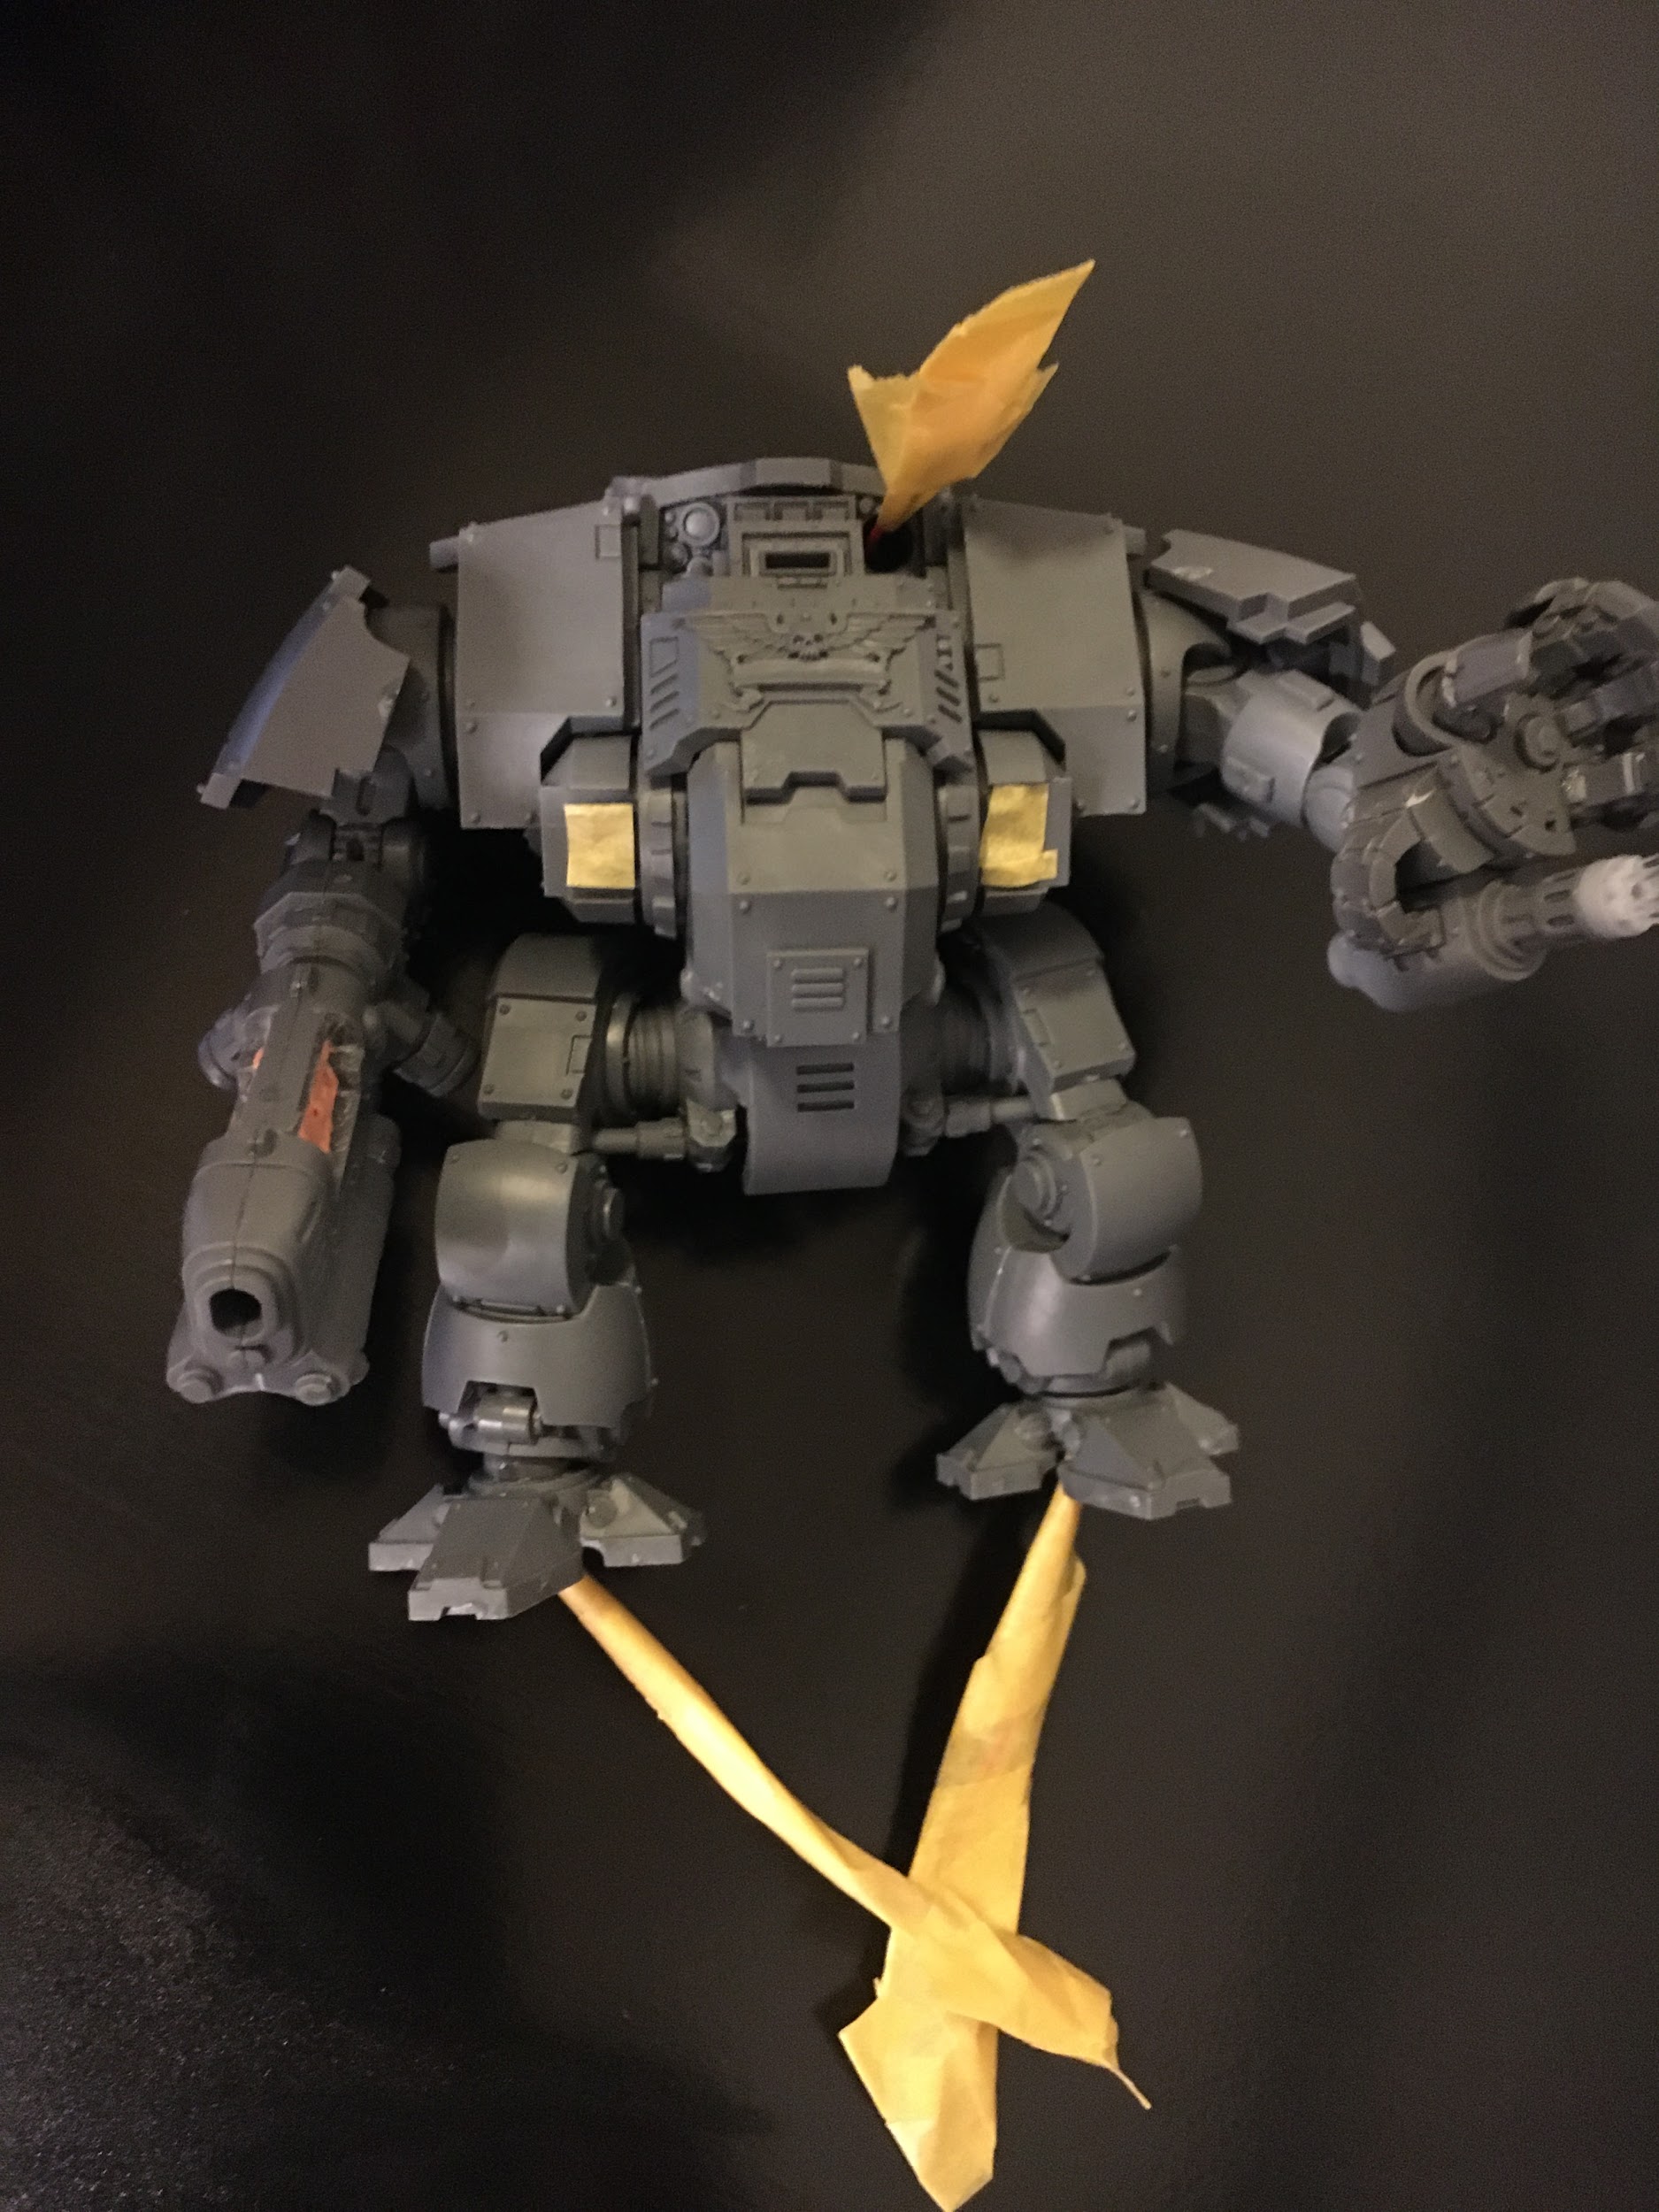
I masked all the exposed LEDs and any places where paint could get into where it shouldn’t get into.
Robots and machines work out great when trying to rig models with LEDs because if it’s impossible to fit a wire inside, you can just make it look like the wire is part of the model! For the gatling gun LED, I made the wire come out from the gun and go back into the model just after the joint so I can still pose it! You can also see the fiber optics on the gatling gun. Another great feature for fiber optics is that you only need the cross section to be exposed. I like to leave them long when I paint the model, then just cut them when it’s finished. You get a real crisp light that comes through and its completely flush.
Painted the main colors with an airbrush to get some nice color transitions and shading/highlights.
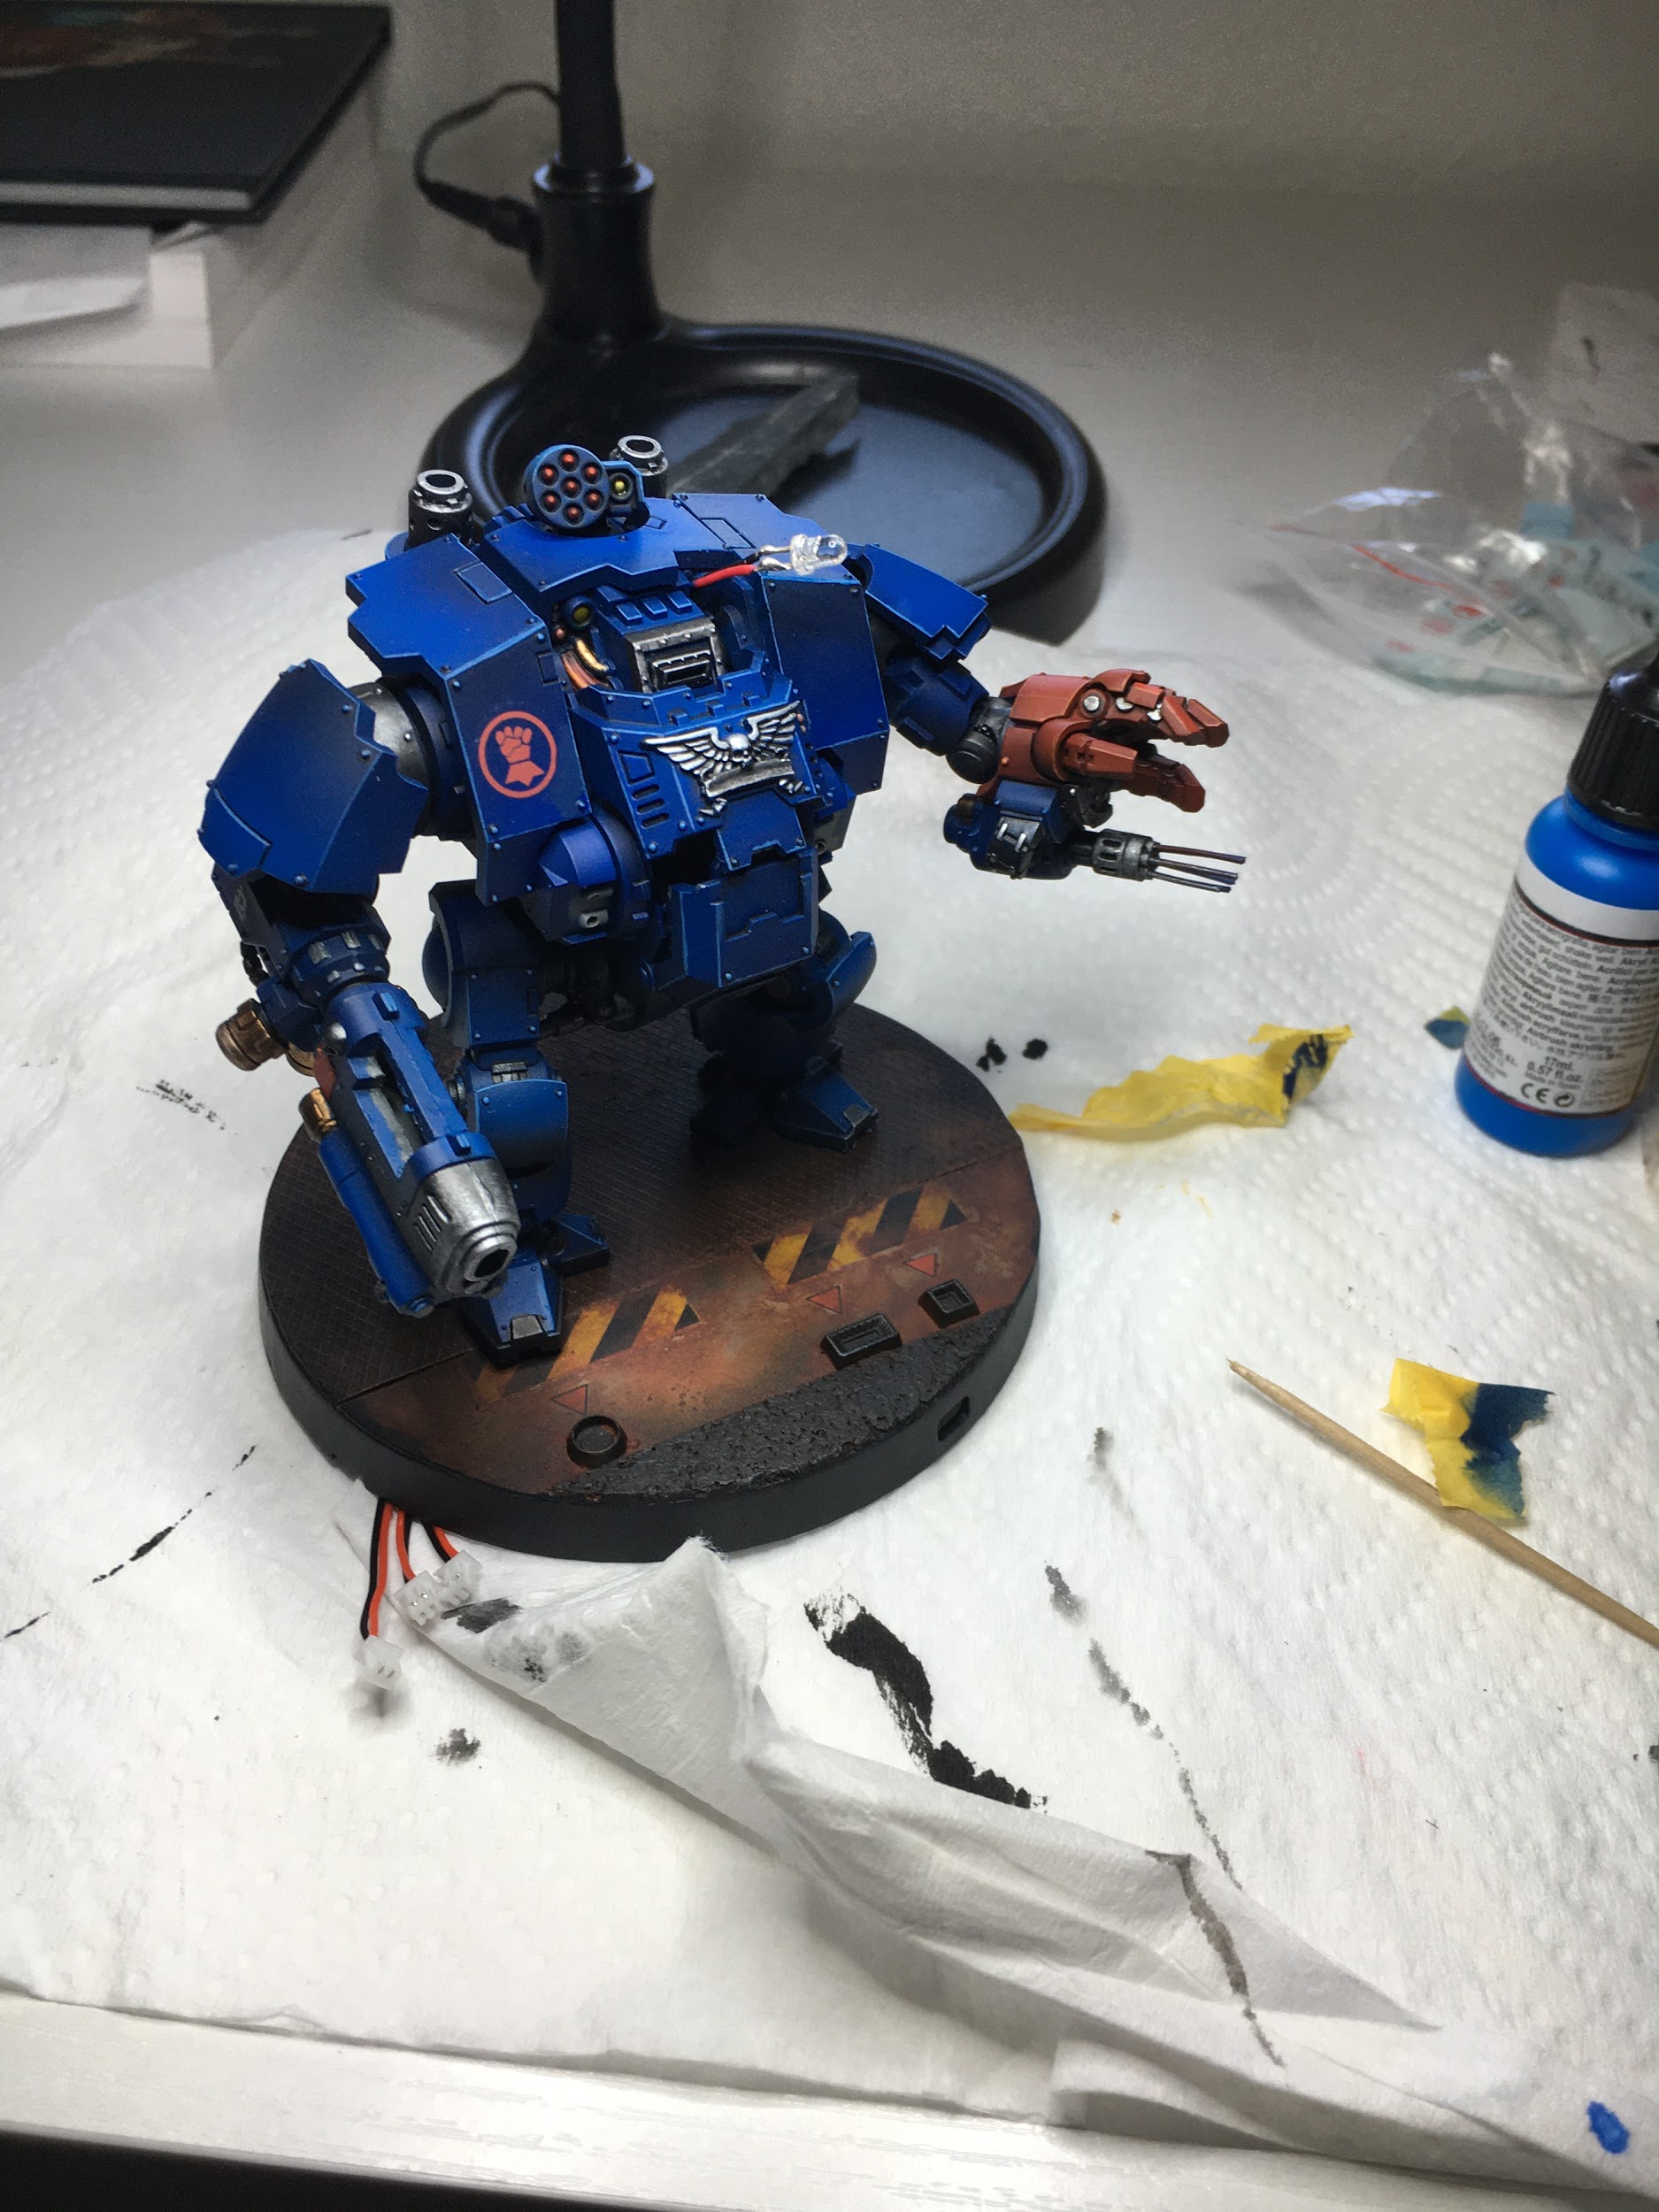
Then finished up the detail by hand! The base was made with some textured plastics for the metal grate and cork board for the asphalt. Thin cork sheets painted black make for a really nice to-scale asphalt. To get the weathered and rusted look, I hit it with many layers of nuln oil and agrax earthshade and then after it was dry scraped it up with various abrasive objects. It gave a really cool chipped paint look.
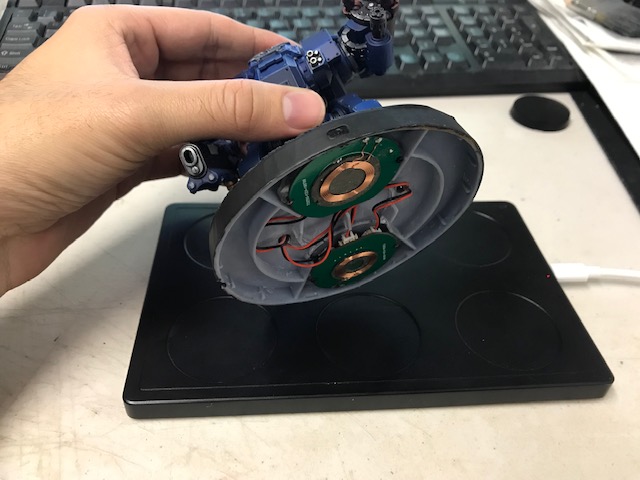
When all the modeling and painting was finished, I was able to plug in the power packs for the LEDs in the base. These ones are induction charged so I don’t have to change out the batteries!
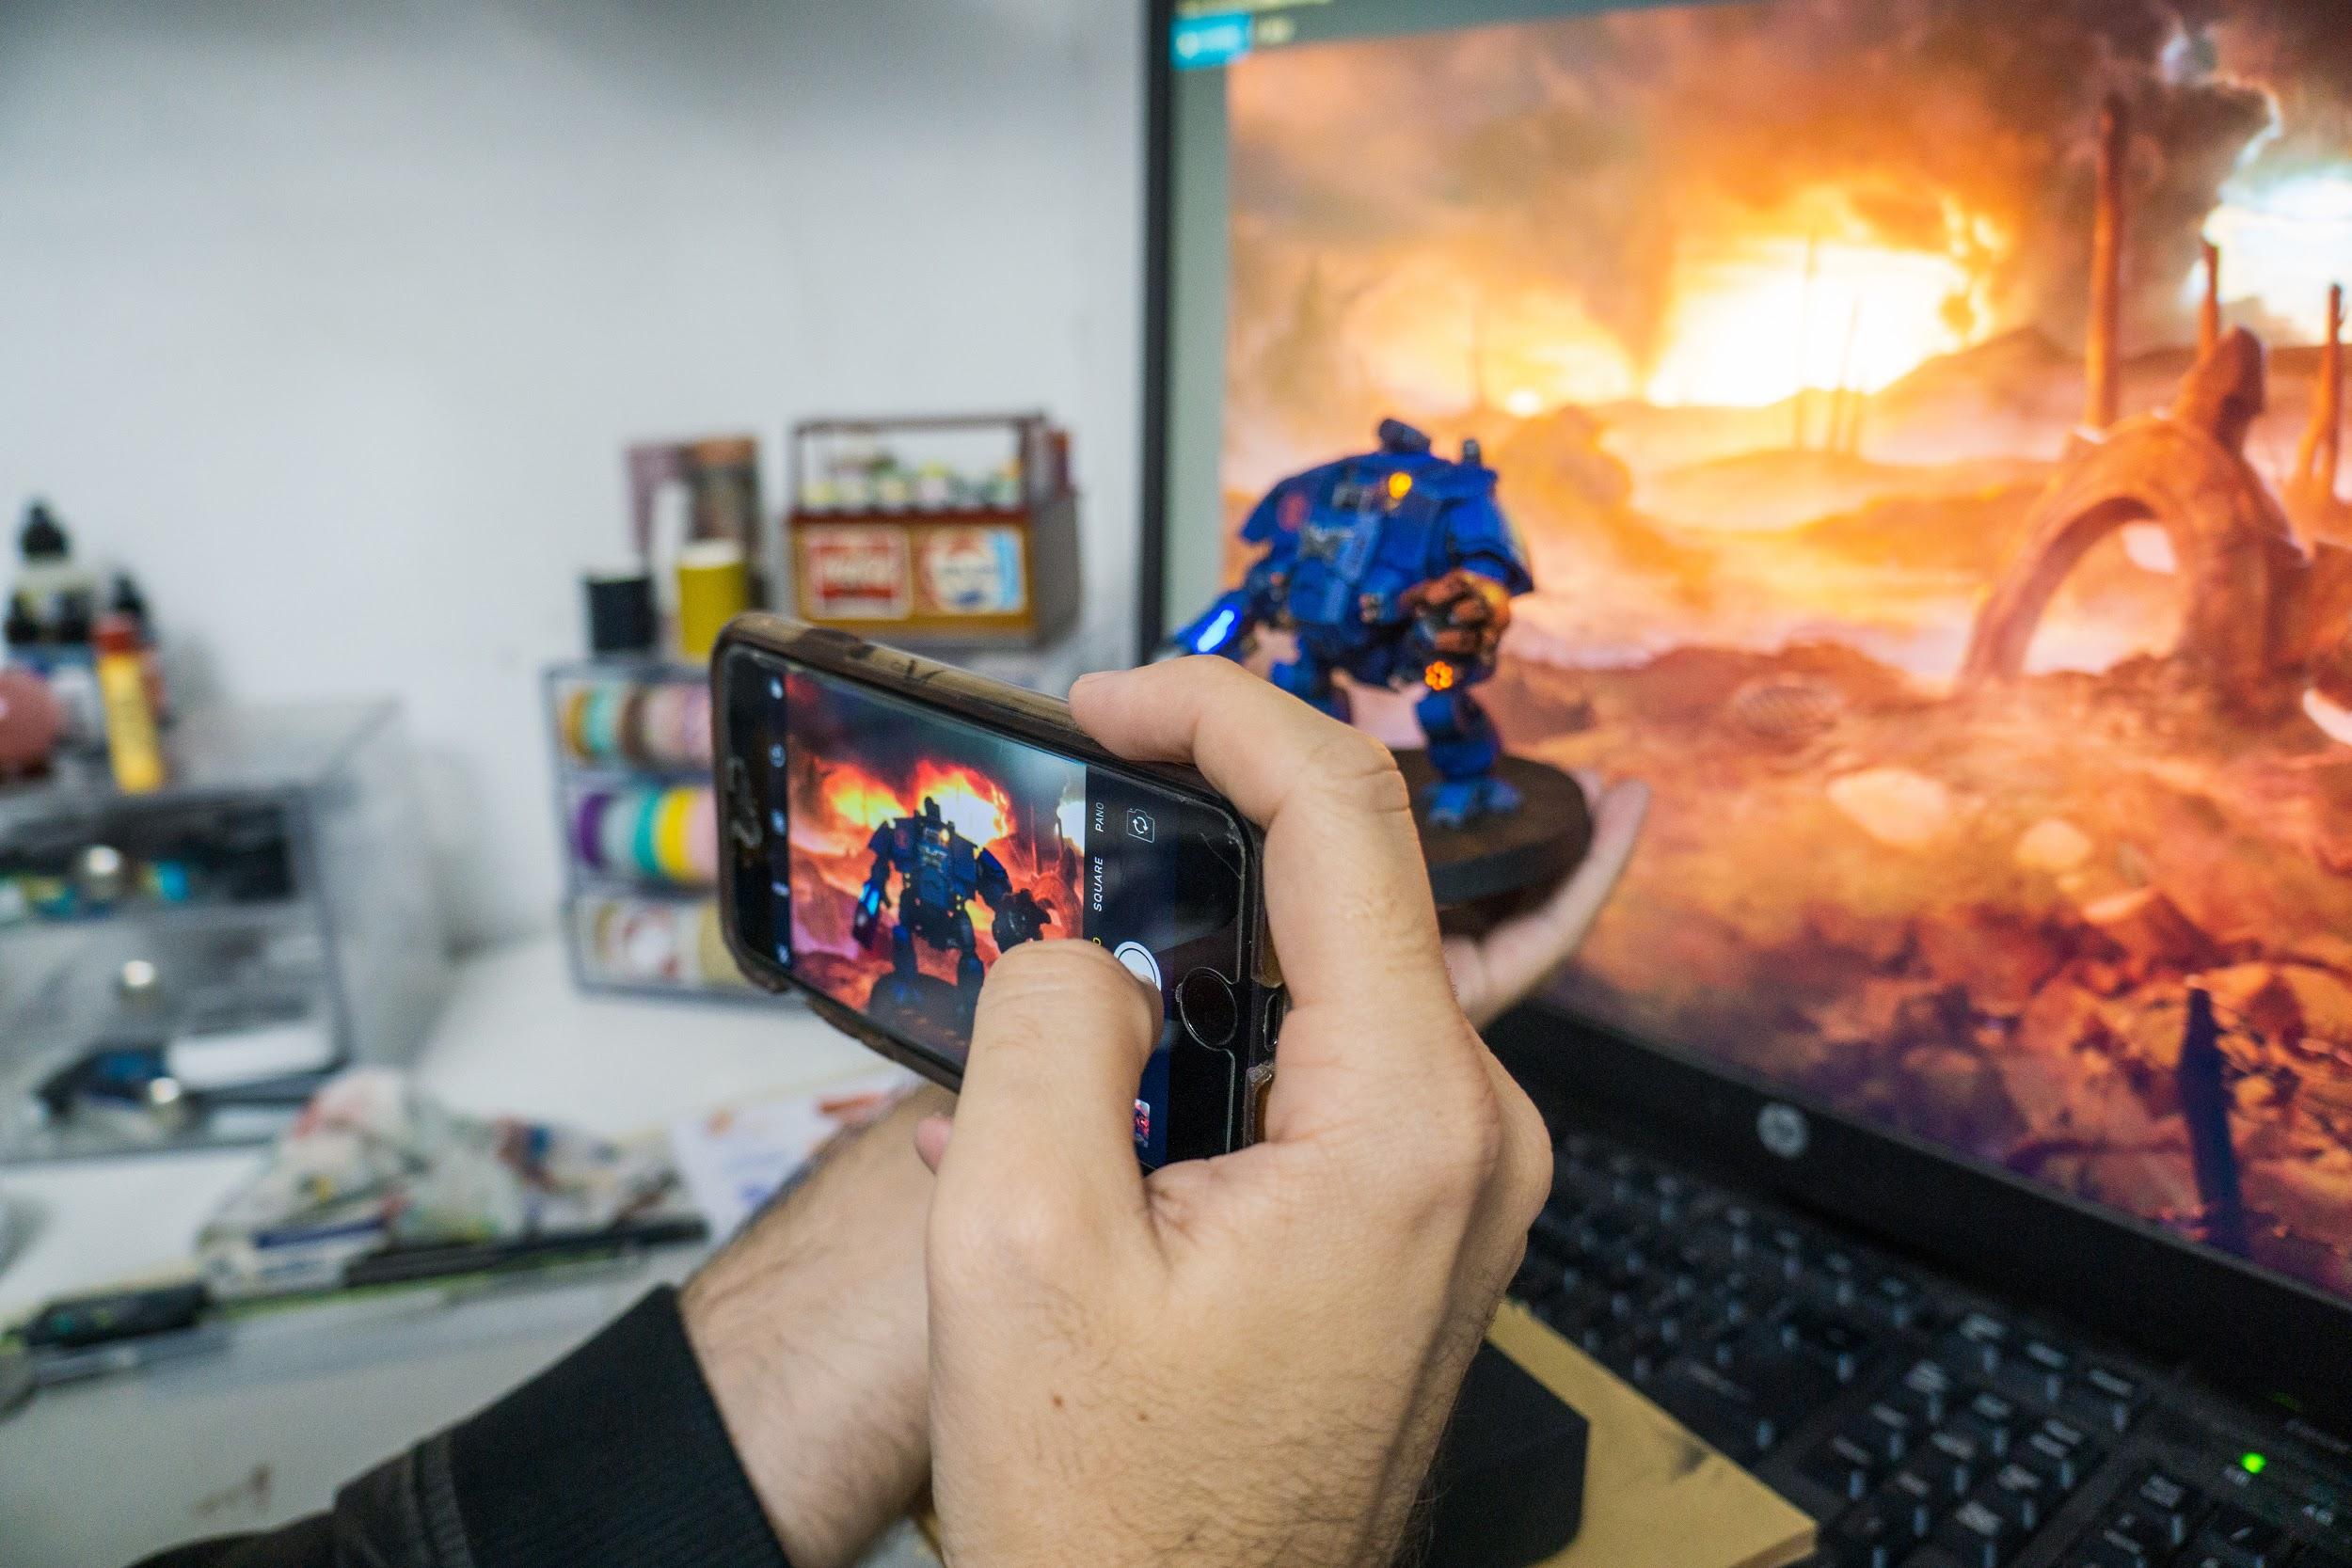
Took a very professional photoshoot for good measure! All jokes aside, this was actually super effective and a cheap way to make your models look good! I used a proper camera and toyed with the lighting a bit but I would highly recommend this for action shots!
This was a super fun build! I used a dremel tool for a lot of the cuts and bores which saved a lot of time but everything I did here could be done with a small hand drill, a hobby knife, and wire cutters!
If you liked this build, check out more of my work at facebook.com/omnissious
If you liked the induction charged LED packs check out my Kickstarter
That’s so awesome. Nicely done!
Amazeballs! I am always impressed when 40K models are rigged up well with LEDs. I don’t think I would ever have the guts to do it myself, so thanks for letting me live vicariously 🙂