


Few things evoke more imagery to me in the Warhammer 40K universe than the Legion Of The Damned. So when I was looking through my Instagram account when I came across Legionnaire Minis. They have a wonderful paint style and have applied it a number of stunning Legion of the Damned minis. My own take on the Legion has been crossed with Custodes and went in a different direction…
They were kind enough to allow me to put up the tutorial of how to achieve a look similar to this as well. So he sent me along some pictures and text. So lets look into the tutorial.
First step assembly

I like to pin all my metal models except the backpacks, they get the backing soda treatment. Bases are garden bark sanded flat at the bottom then glued down and covered in thin glue to make them solid. Use any ground texture to wherever looks good.
Models are then pinned all the way through, bent end and baking powder and glue blob underneath.
Second step
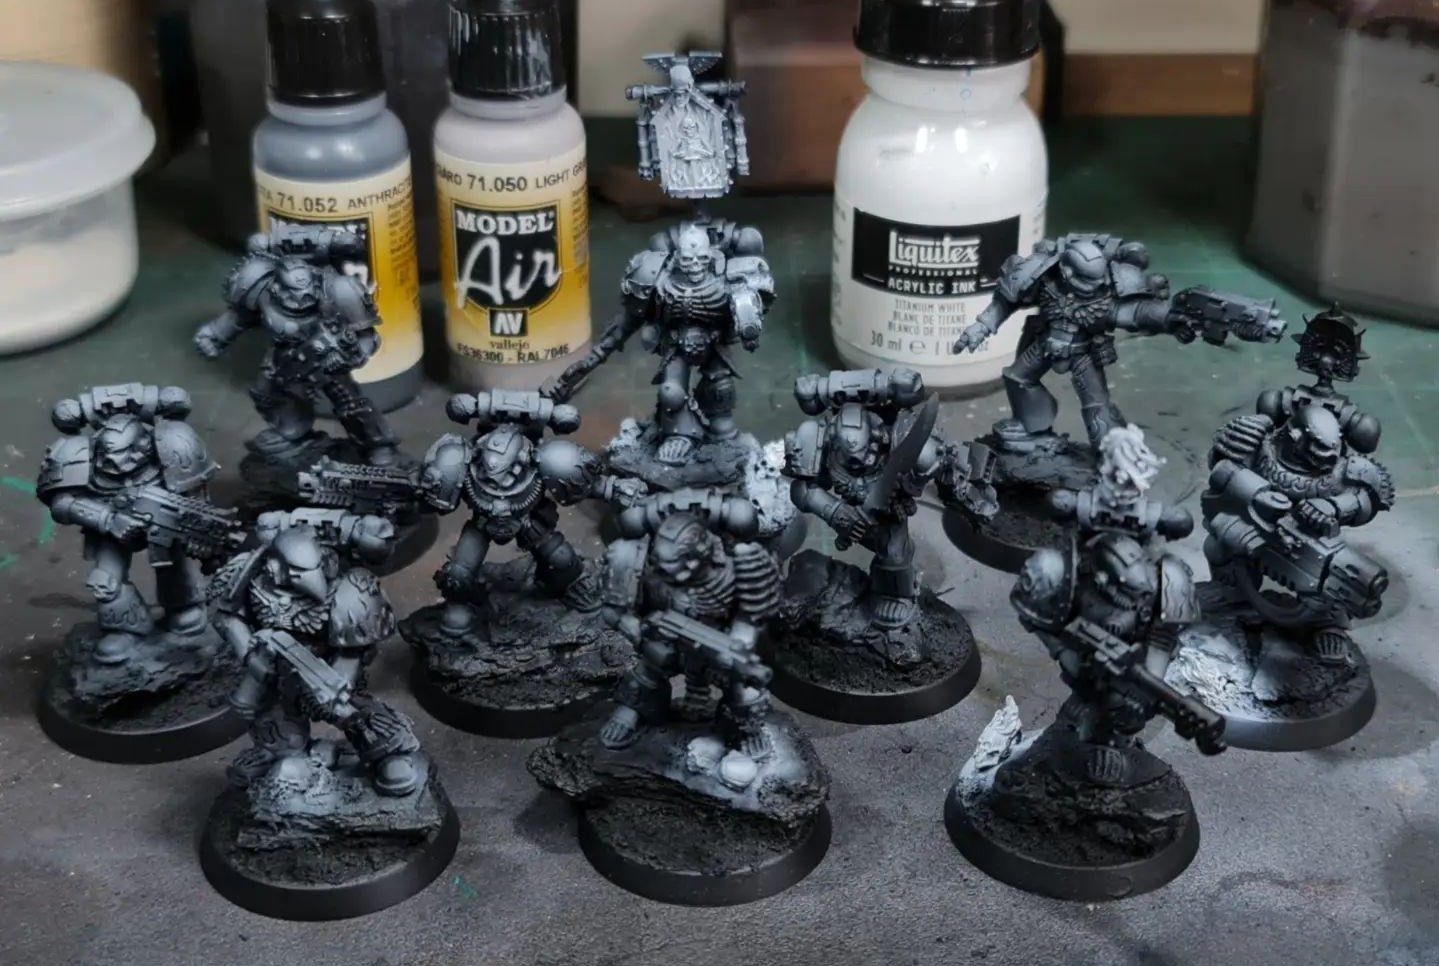
Airbrush black primer, with blue-grey mid-tone on high spots. Concentrated light grey in the same spots but smaller and more focused on higher areas.
White ink for any parts that are easy to reach for fire (braziers and flaming skulls, etc). Be careful of over spray if you are going to do this, otherwise use a brush.
Third step
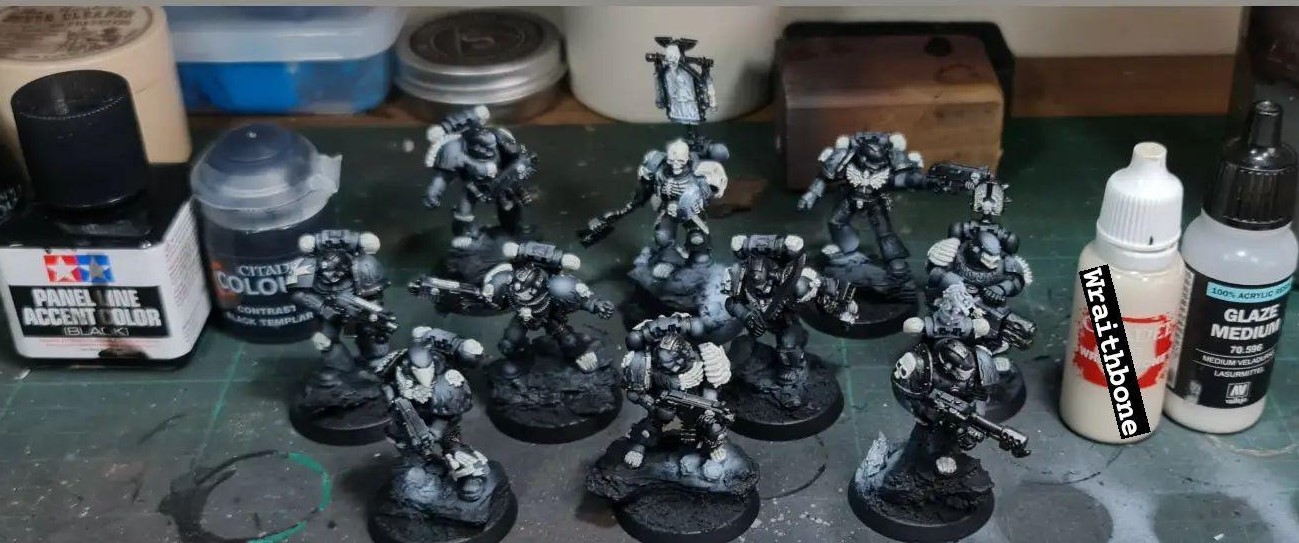
Pin wash recesses with panel liner or oil. Thinned Contrast black for armour joins and reinforce shadows may have gotten too bright.
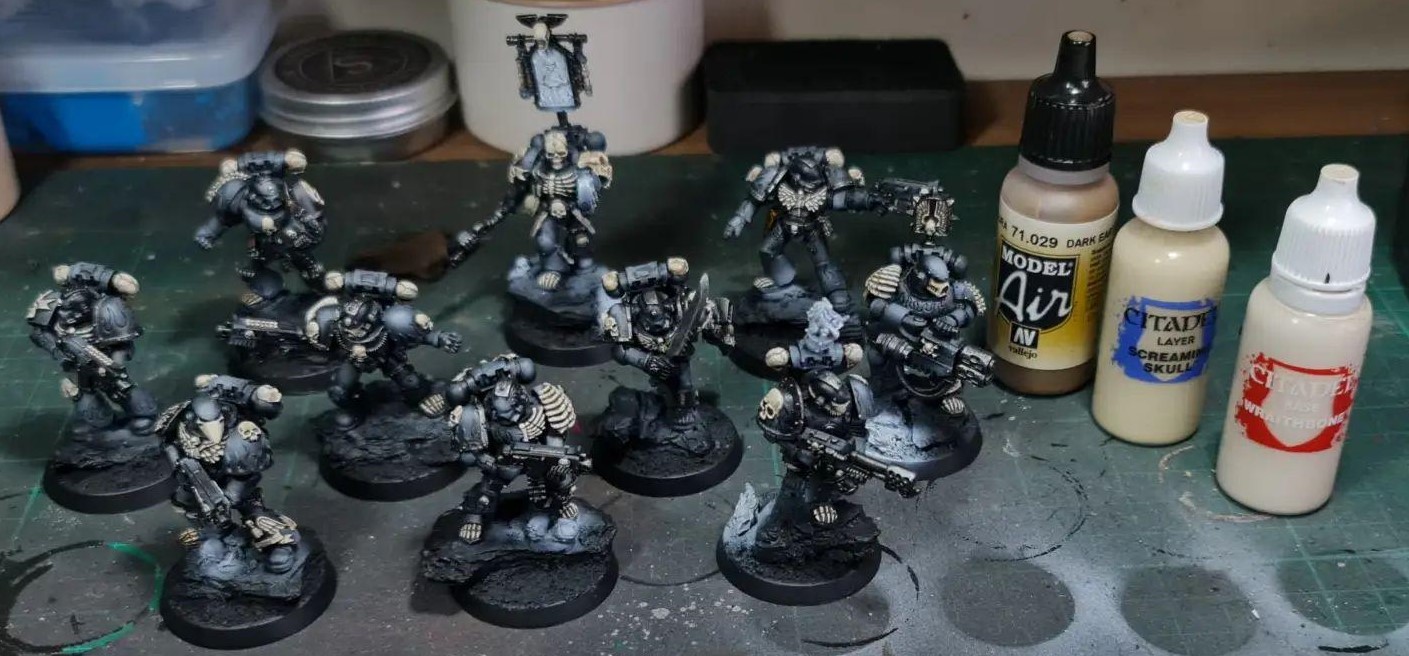
Basecoat bone, skulls and skulls (I use Wraithbone with glaze medium or airbrush thinner) – two thin coats.
Fourth step – wash the bones and skulls
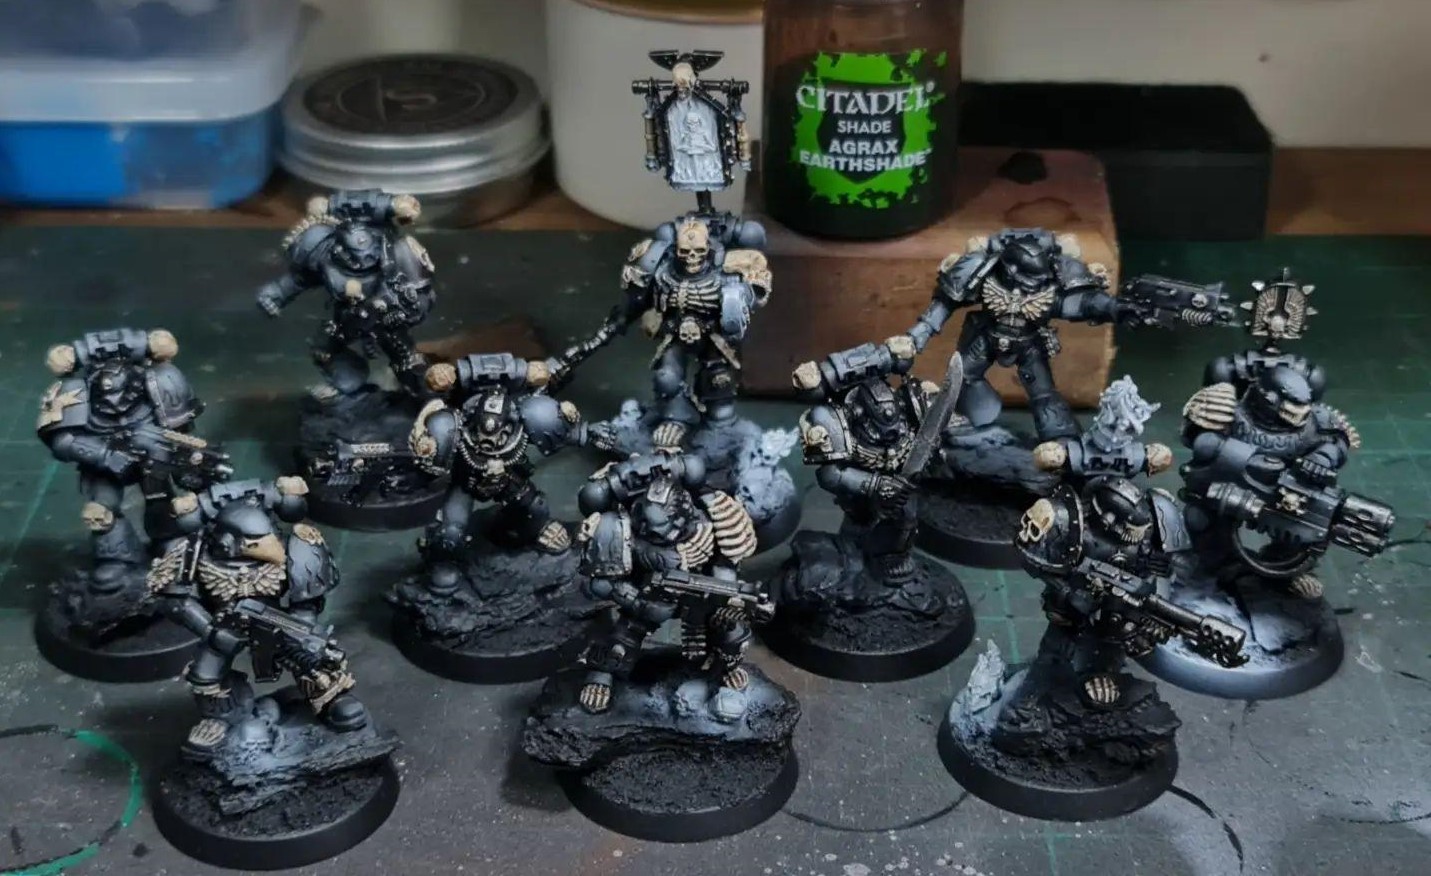
Fifth step – highlights back to Wraithbone
Sixth step – base coat flame and fire

Seventh step – blending flames

Painting fire – I start with red at the top and blend down to white (you could skip every other colour here). I tend to use a different amount of each colour on each flame, depending on what the blend needs. Touch up black where the colour has split over.
Reverse for “real flames”, center should be the brightest and finish with black on the tips.
Last step – finishing touches

Bases are drybrushed with Screaming Skull and then washed and adrax drabs while still wet. Edge highlight with original greys, only on the sharpest edges. Add glow effects where desired (another tutorial for another day).