


The Imperial Knight Warden is a wonderful kit, so very many options. But it does have one particular problem I feel and that is that everyone builds them in the same pose. I mean it is a pretty good pose for a engine of destruction, yet I felt it lacking. So despite this being my first foray into the kit I have started to convert it. First plan is to give it something to rest its little feet on:
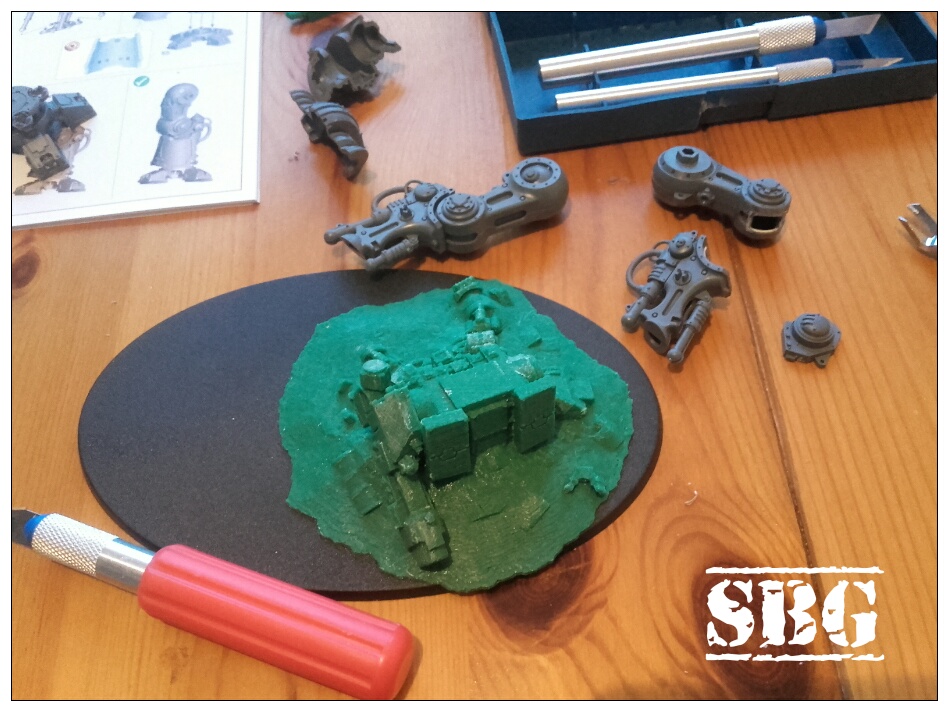 So queue up a 3D printing of a loyalist dreadnought being crushed into the ground! A perfect object to raise up one foot and alter the stance. But to do that I needed to alter the leg, you can see in the above picture were I sliced it open before gluing the two halves together.
Dreadnought stomping
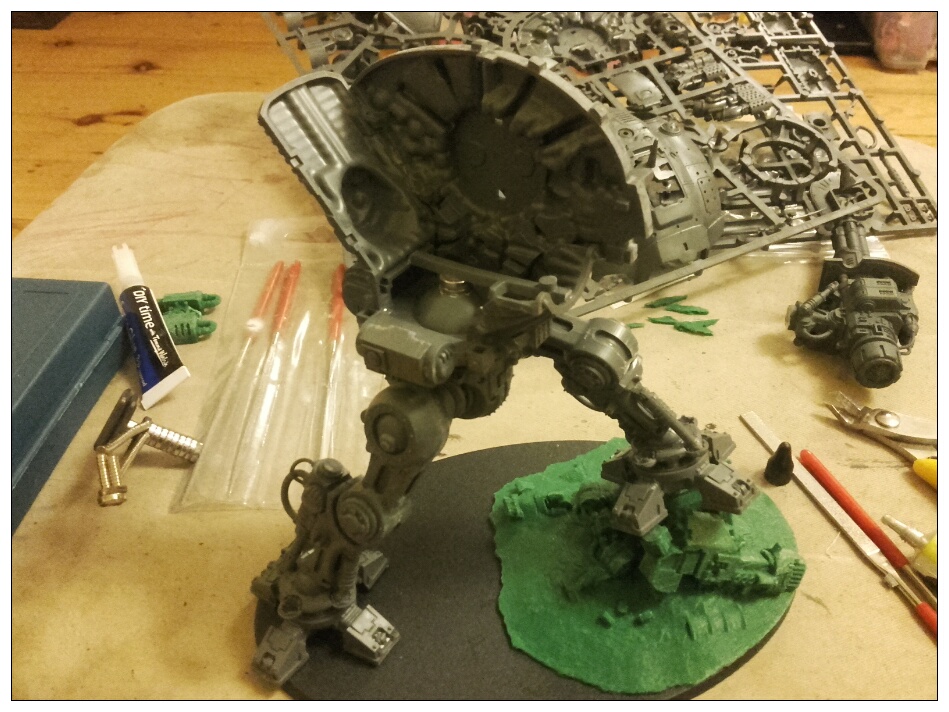
Now that we have pose changed it is time to play with magnets. Not only will this help giving more weapon options but also with transporting the big beastie. My plan to magnetise the torso is not going well so far. The magnet keeps pulling off the extra bar I made to hold it in place. Any thoughts on keeping it attached?
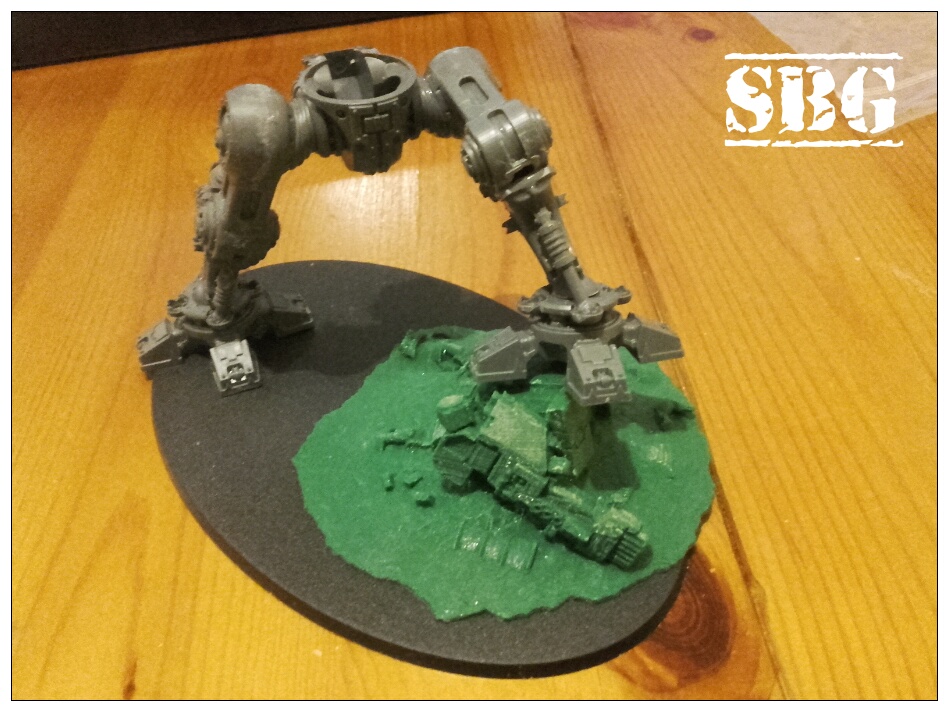
The toes of the left foot don’t quite hang right to me, so I am pondering taking a couple off and curling them around the dreadnought. This would mean having to sculpt the connection points. Now I am no Silvertabby or Svartmetall so this could end looking rubbish… but no guts, no glory!
So that is were we are so far, what do you think of my fledgling Chaos Knight? Needs more Chaos I think.
The smashed Dreadnought is an awesome idea. The reposing is a lot of work too. Once you get the legs right then you have to adjust damn near everything that attaches to them.
Is the torso the same as a normal Knight? On the normal one you have the ball socket on the upper torso, and that just sits over the ball on the lower torso.
I imagine my next couple of hobby sessions will be sorting out of lot of the leg connections. The armour plates will be staying off for painting.
It is a bog standard normal knight. Maybe the ball joint connection could have held it, thought it would need a magnet is all.
I magnetized my torso also. What I did was cut down the ball a little, the height of two magnets, and glued the magnet onto the flat surface I just created. On the upper torso I just glued a magnet right into that recessed ball socket area.
If you do something like that then you won’t need that bar you created.
Good stuff. I will give it a look when I some time in tonight.
Crush the snivelling corpse-worshippers!
So thoughts on what legion/chapter to paint it?
Another idea for the torso is to expand the hole in the socket part into a slot, and then glue in a crossbar on the peg at the top of the ball. Orient them so they line up at an angle you’re unlikely to want them in while using it, and they’ll do pretty nicely. Same basic principle as the turret fitting on a Leman Russ.
For rebuilding the toe joints if you re-pose there, some plastic rod can help make that go far smoother and look far better than trying to just do it with putty. It takes a little while to get the hang of, but isn’t that hard to get decent at.
Magnetizing arms: My solution was to cut off the rim at the top of the peg that fits into the shoulder piece and put magnets in there. Worked fairly well, but I kind of want to go back and re-do it with bigger magnets. the 1/8″x1/16″ I used aren’t really strong enough to hold up one of those arms.
All good points, thanks for the tips. Have managed to get the torso together, held by a magnet from the lower ball joint and a metal plate on top.
I don’t get what you mean by using the plastic rods for the joints though. Got n example?
Bigger magnets are going to be useful for sure.
Look at where the toes join to the foot. There’s a bit there that’s sort of a hinge. If you cut right at the edge of the foot while repositioning the toes, a bit of plastic rod of the right diameter can fill in there really nicely.
Ah yes, now I get you. The makes sense!
You are right Rory, they are usually posed quite samey, so I am looking forward to what you do with this chap. A great start so far 🙂
I already want to try do another one, in full charge.